|
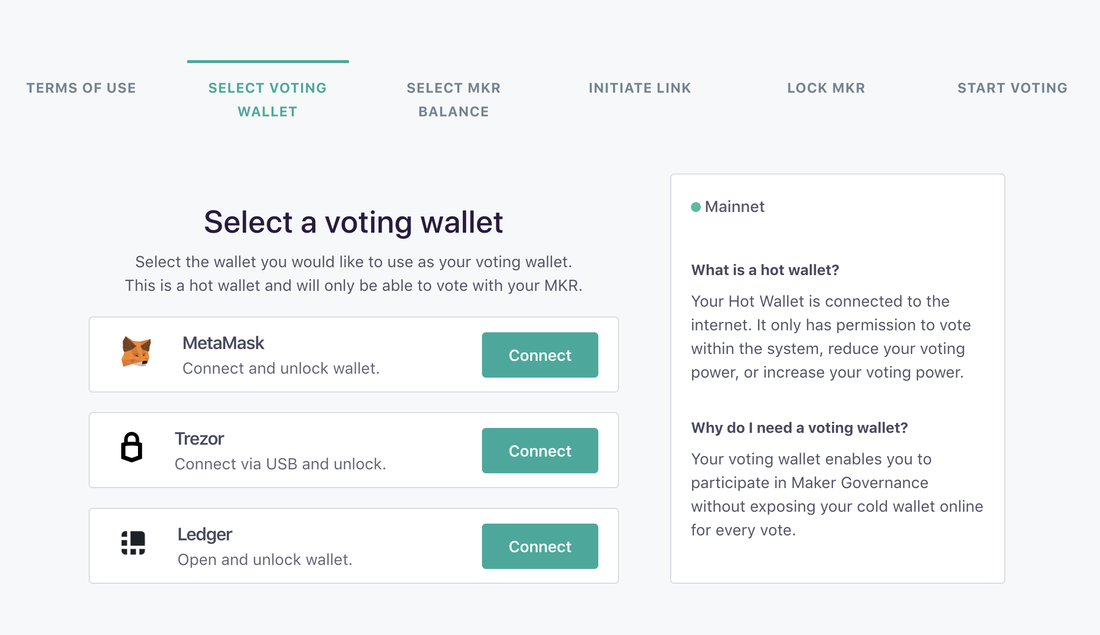
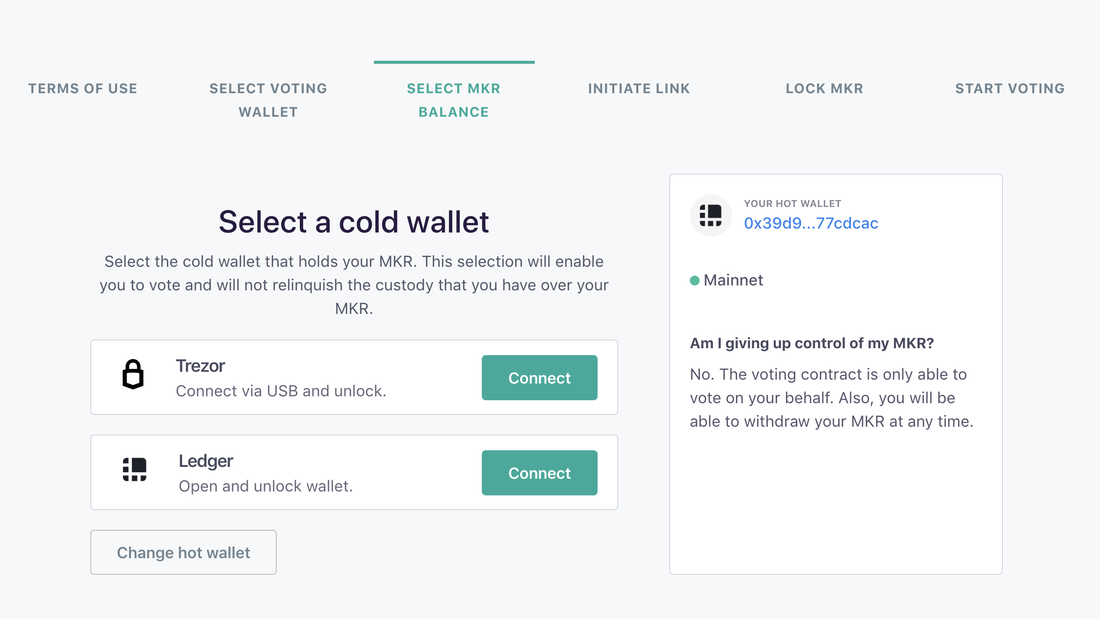
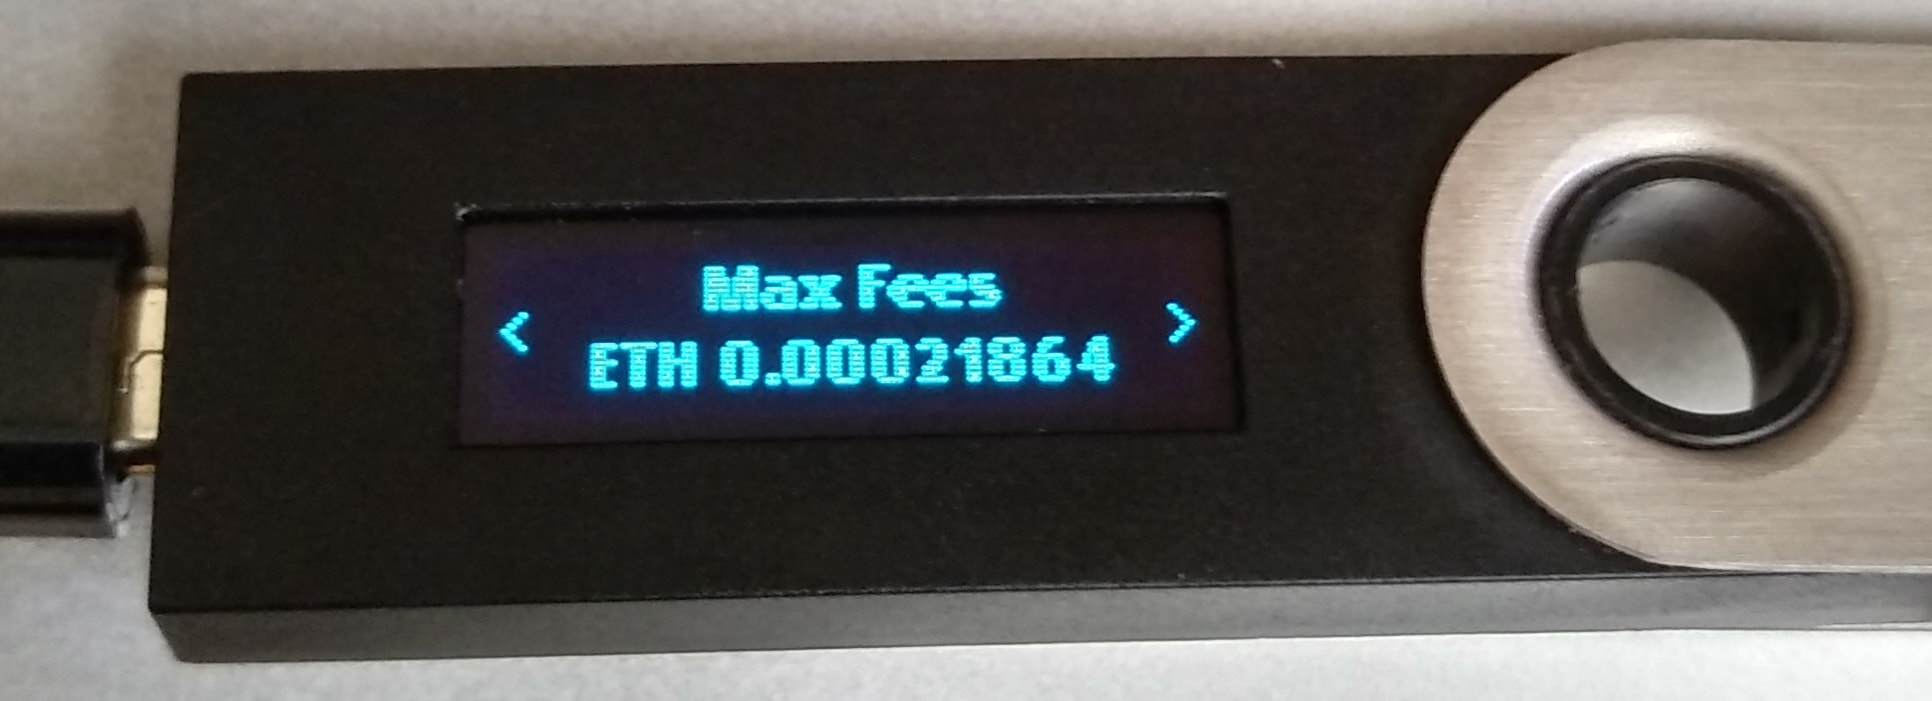
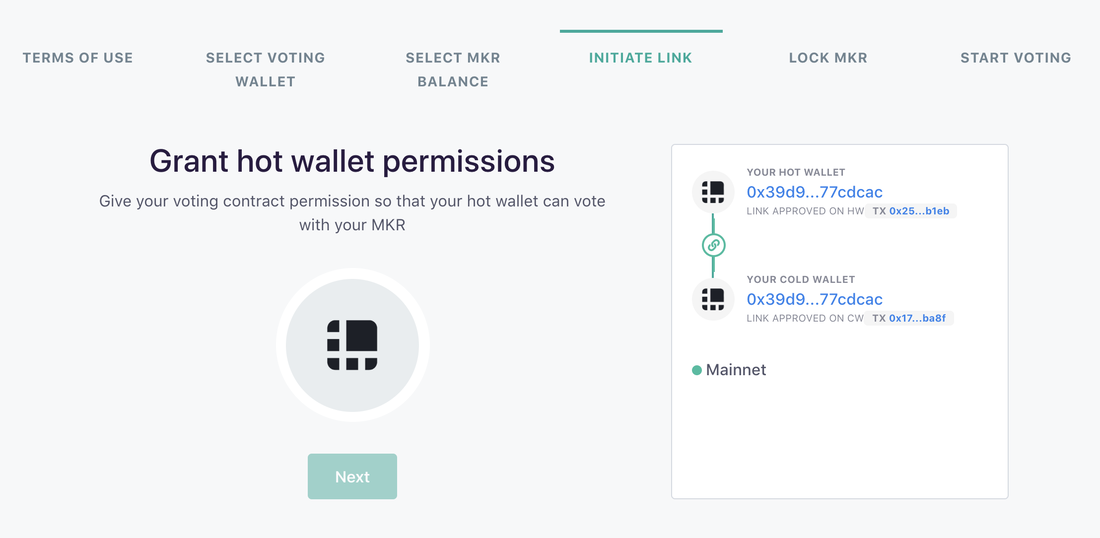
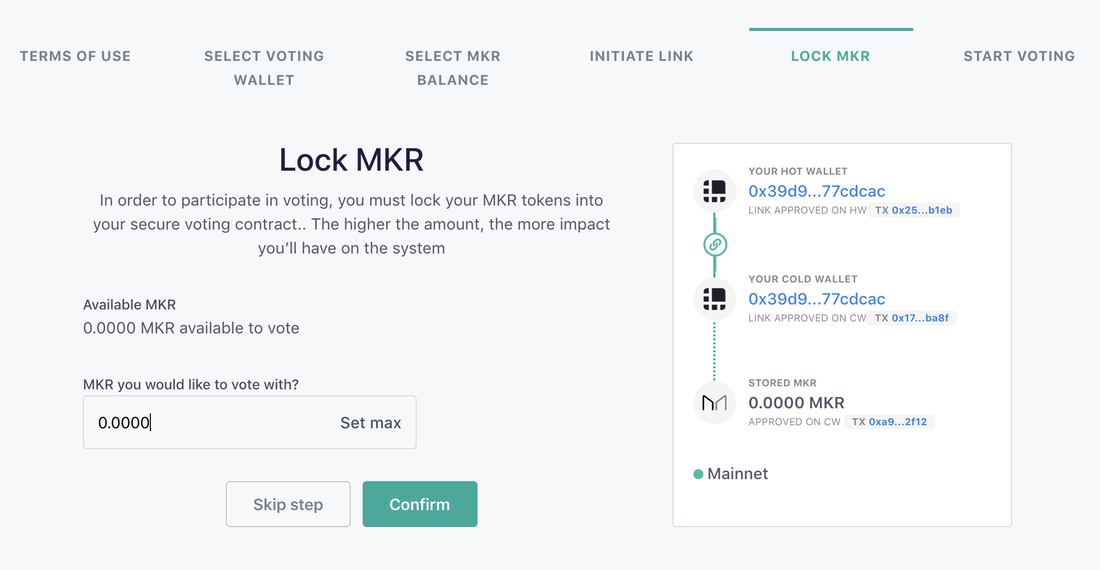
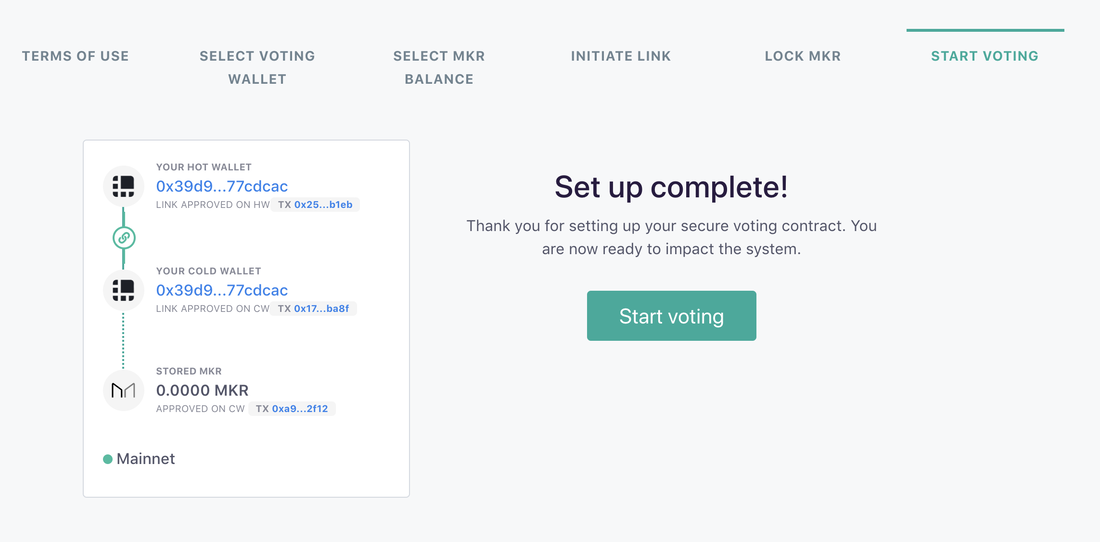
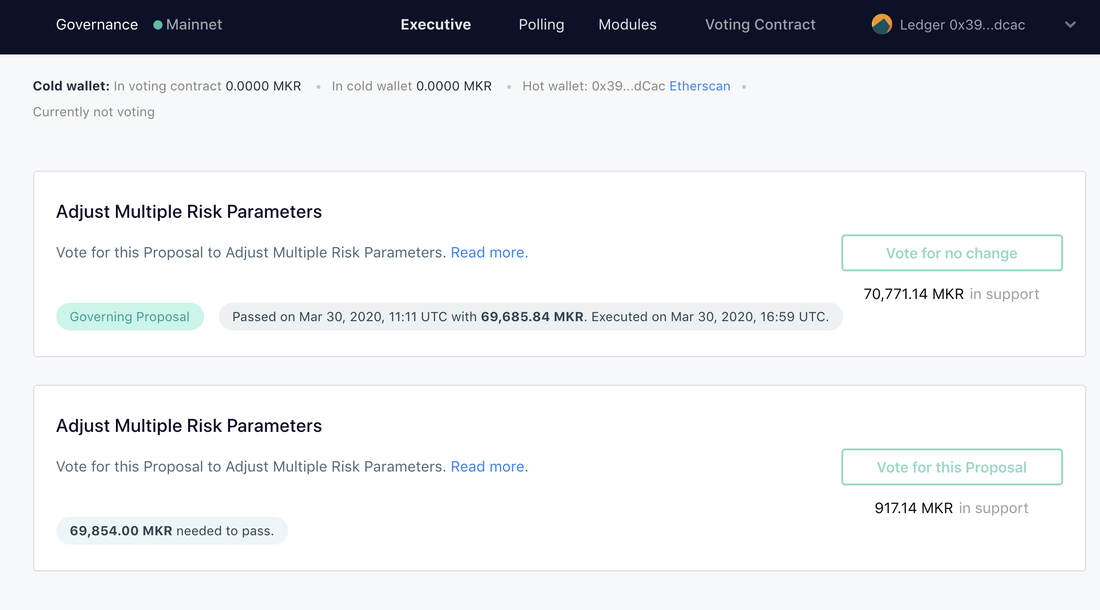
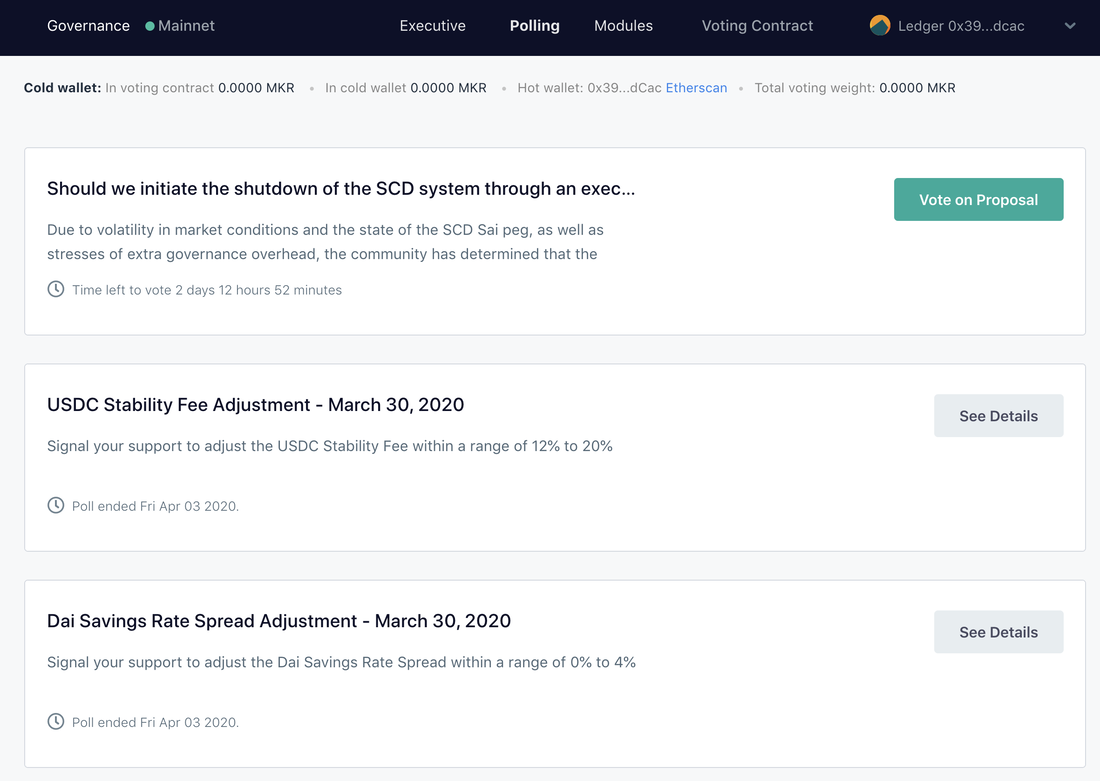
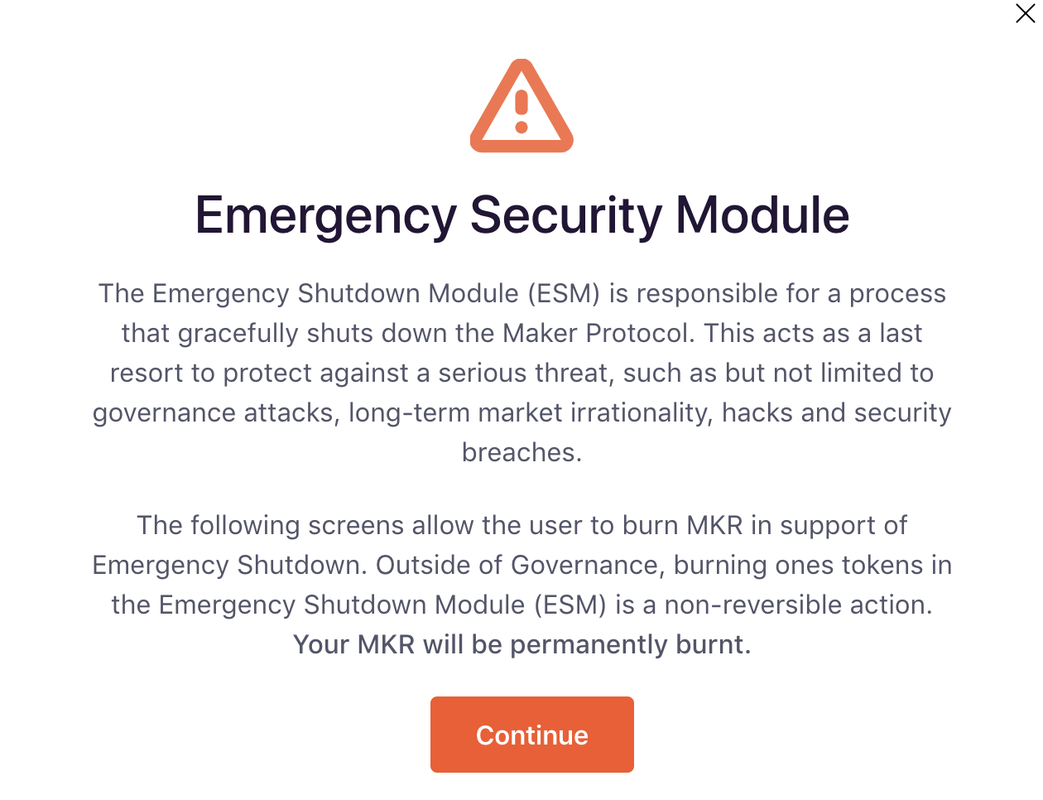
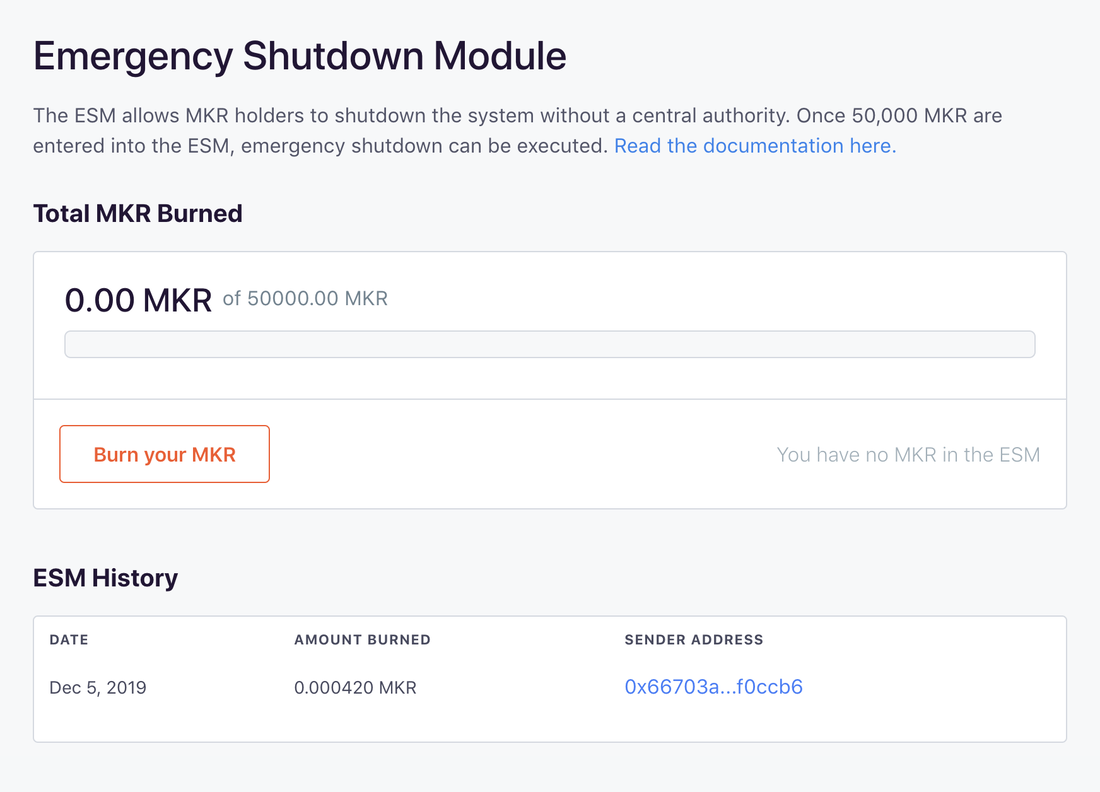
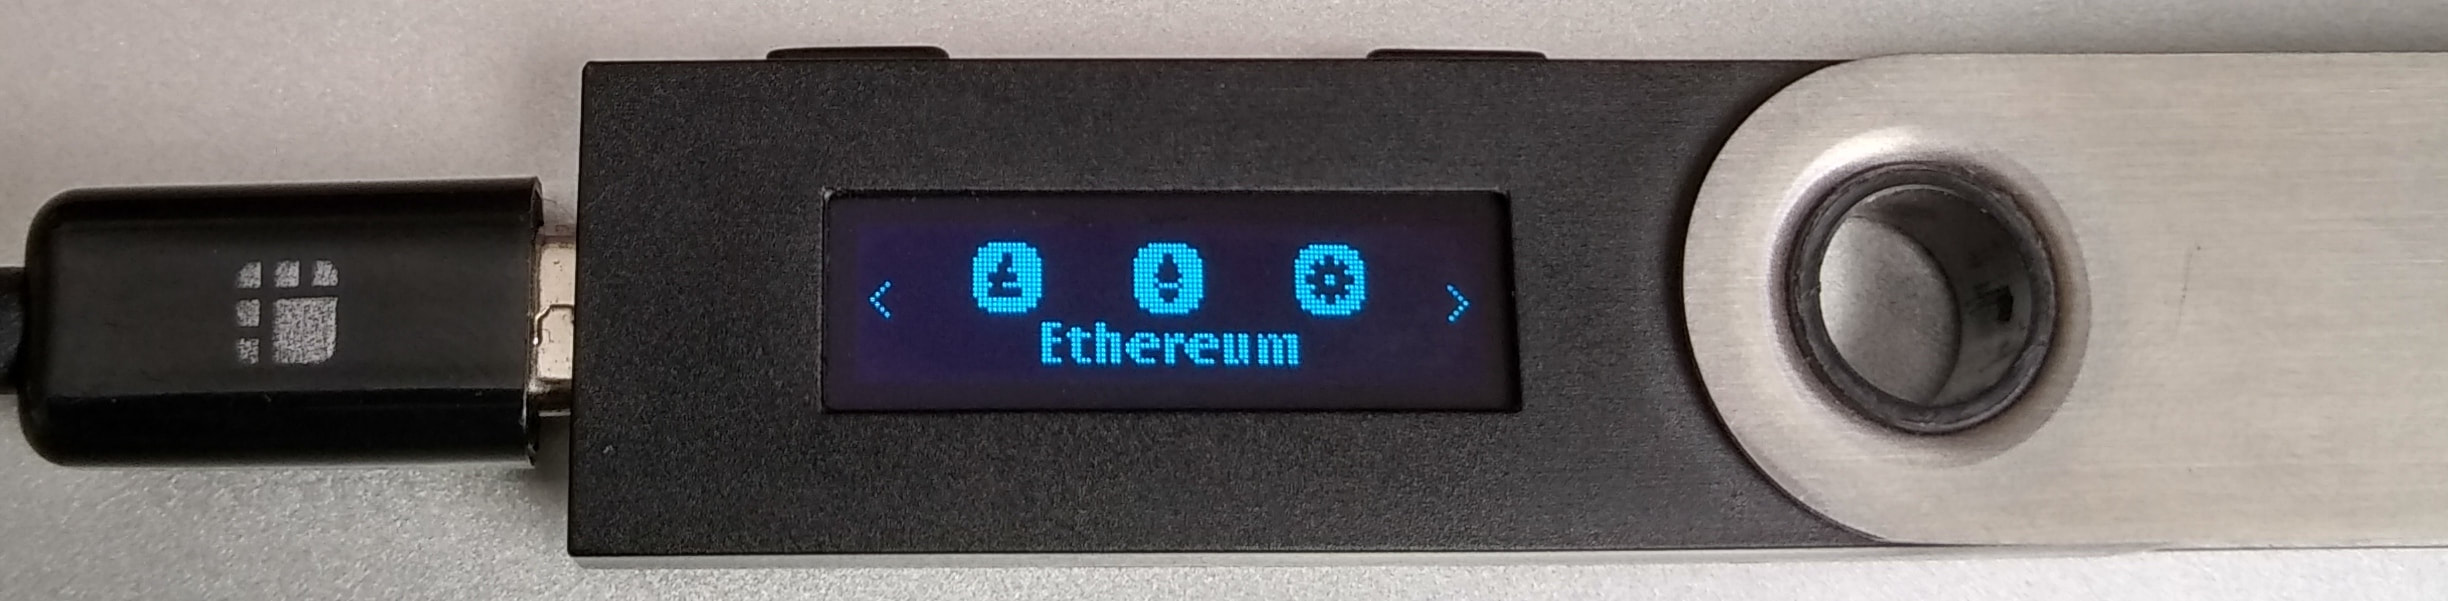
These are other applications from MakerDAO. Maker Governance. This is a voting system as MKR token to be used as voting power. 1: Governance https://vote.makerdao.com/ (I am using ledger HW and choose "Ledger legacy", you can also choose Metamask etc) 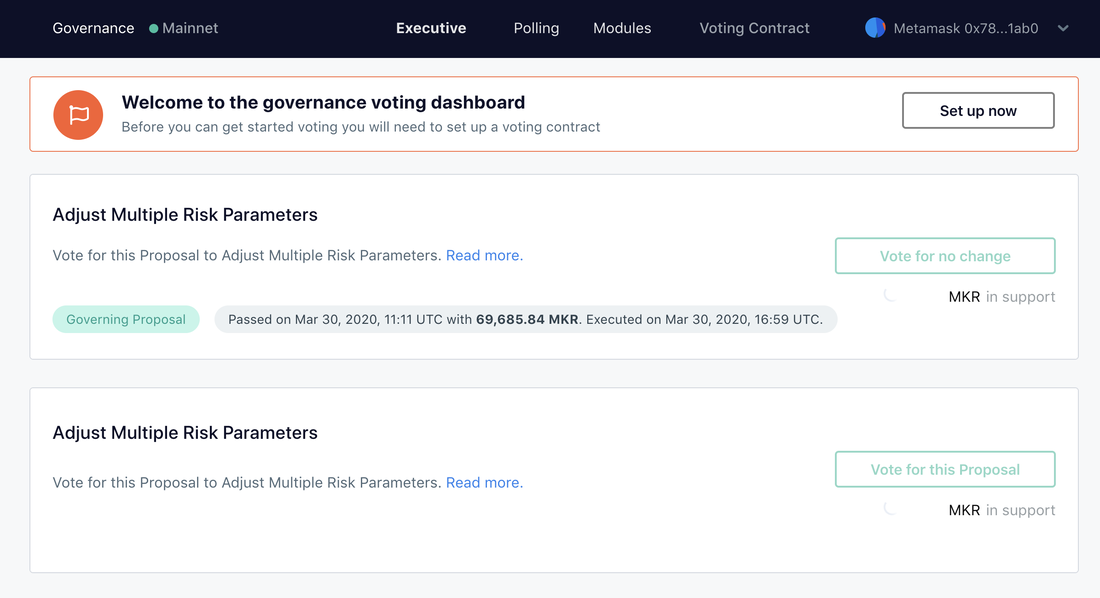 These are how to connect with ledger 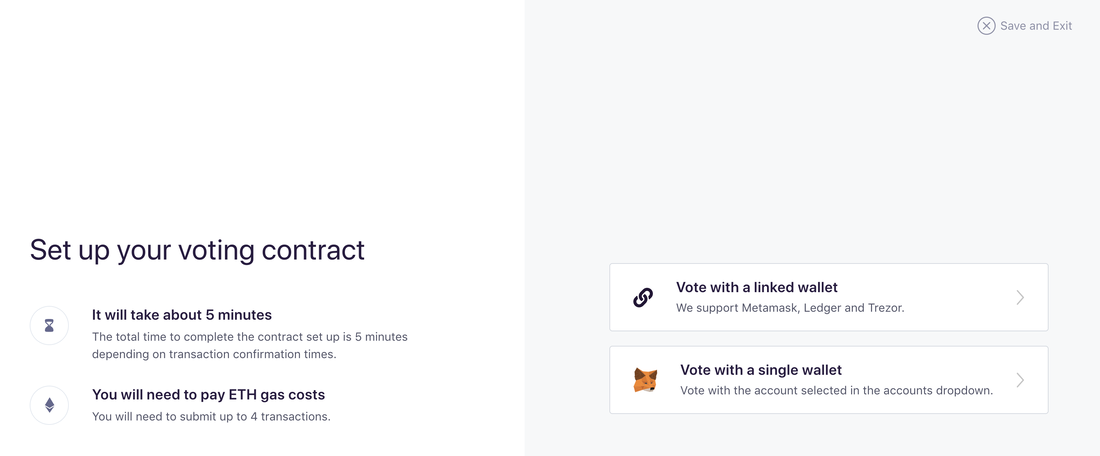 Choose "Ledger" This is how much GAS costs for each execution at the time of writing. 0.00021864 ETH = $0.03 USD I skipped this below as I don't have MKR. Done! This is what it looks like now. I will go through each tab. Executive: Important proposal such as governance. You can't vote without MKR. Polling: Other proposals. I managed to vote without MKR. 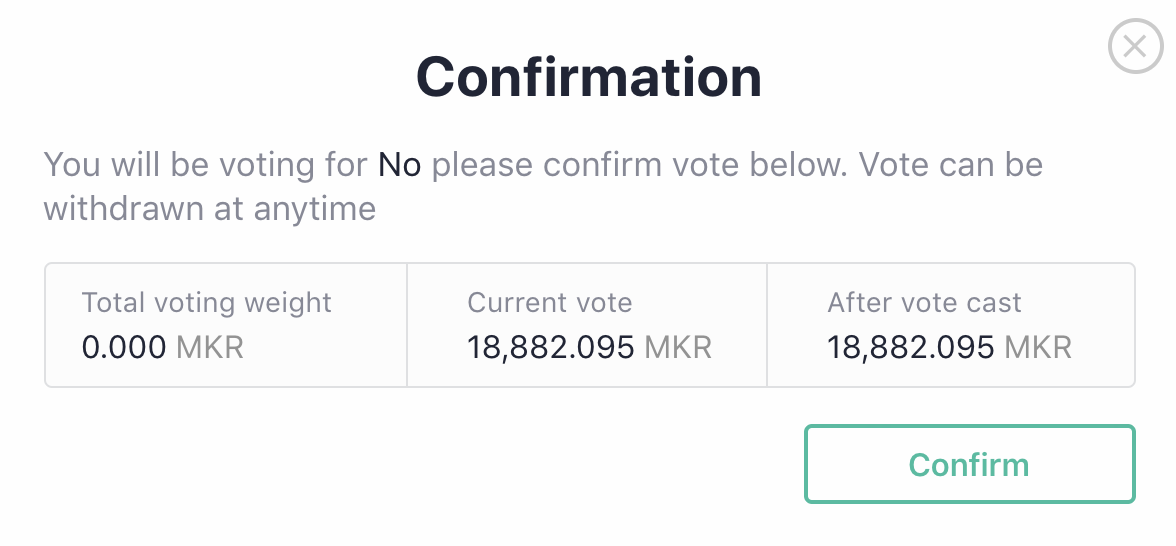 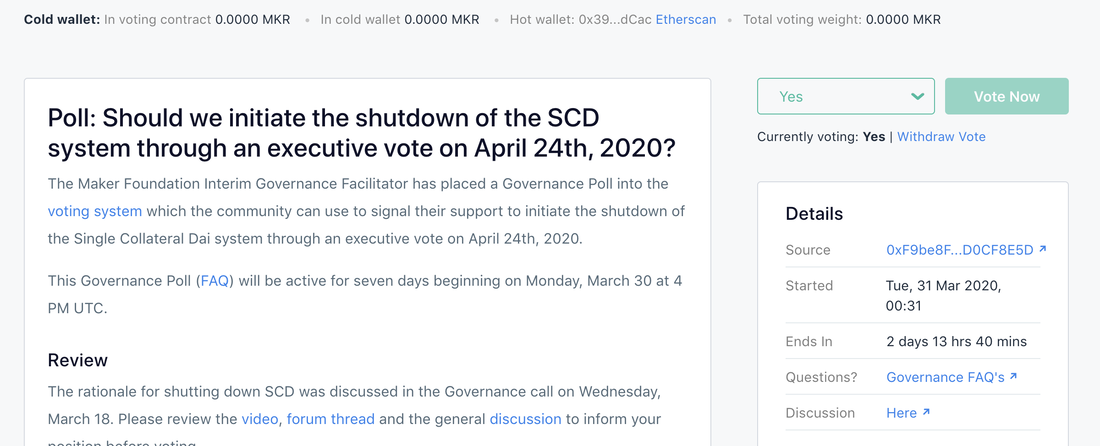 Module: Kill switch in case of emergency which requires 50,000 MKR to burn (Total circulation, 1,005,949 according to coinmarketcap.com). This is possible if MKR isn't decenterized enough? I don't see the point though other than wasting money. Voting contract: To lock MKR in the voting contract I will need to get MKR and lock here to vote on executive governance vote. 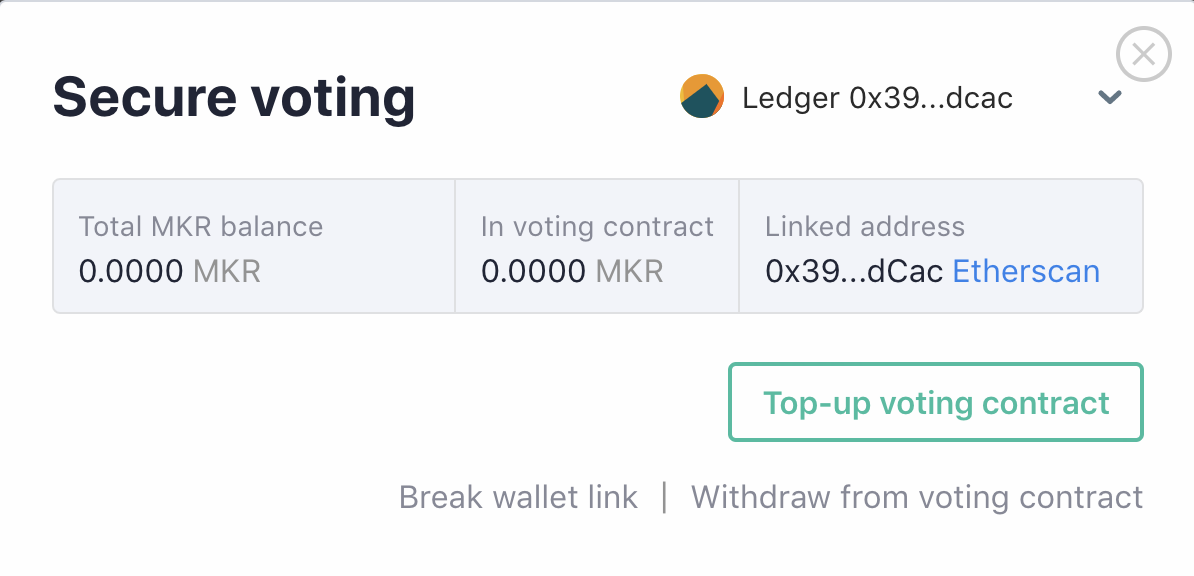 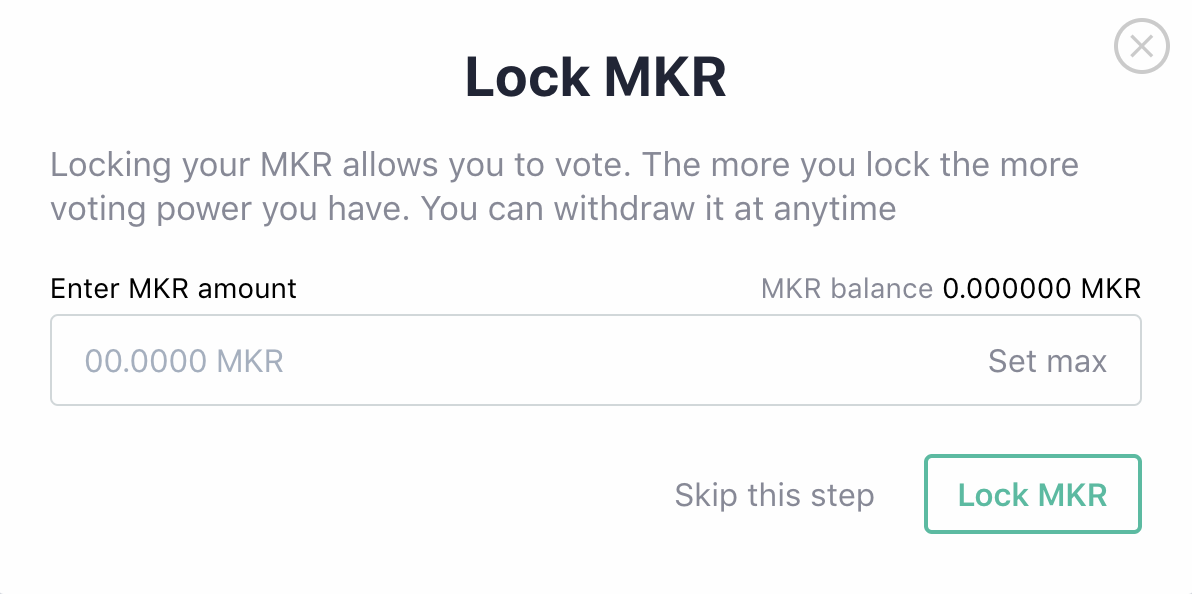 This is to upgrade SAI to DAI. You have nothing to do if you don't have SAI. You will need to upgrade in case of future change. 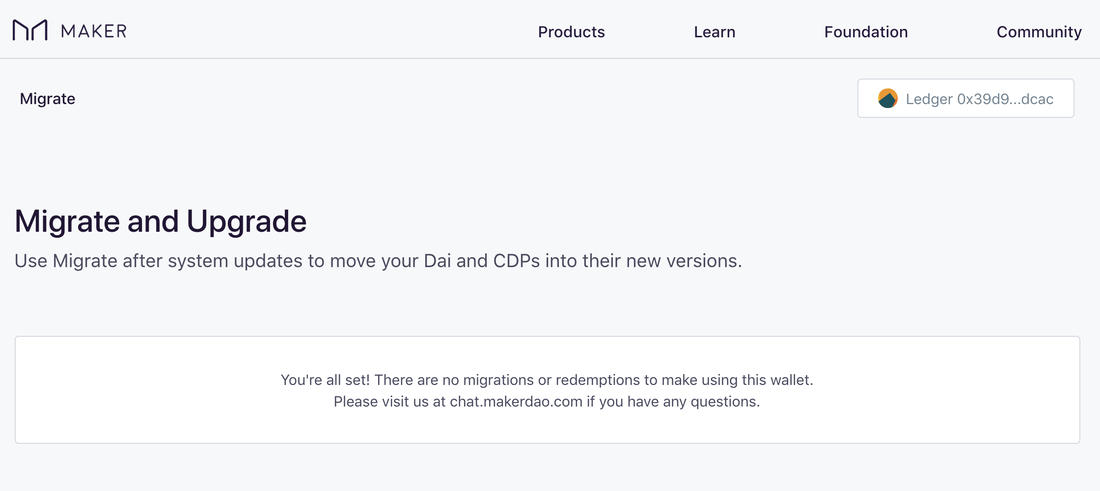 3: SAI CDP Portal https://cdp.makerdao.com/ You do not need to do anything here. This is for someone previously collateralize SAI and need to upgrade to DAI. 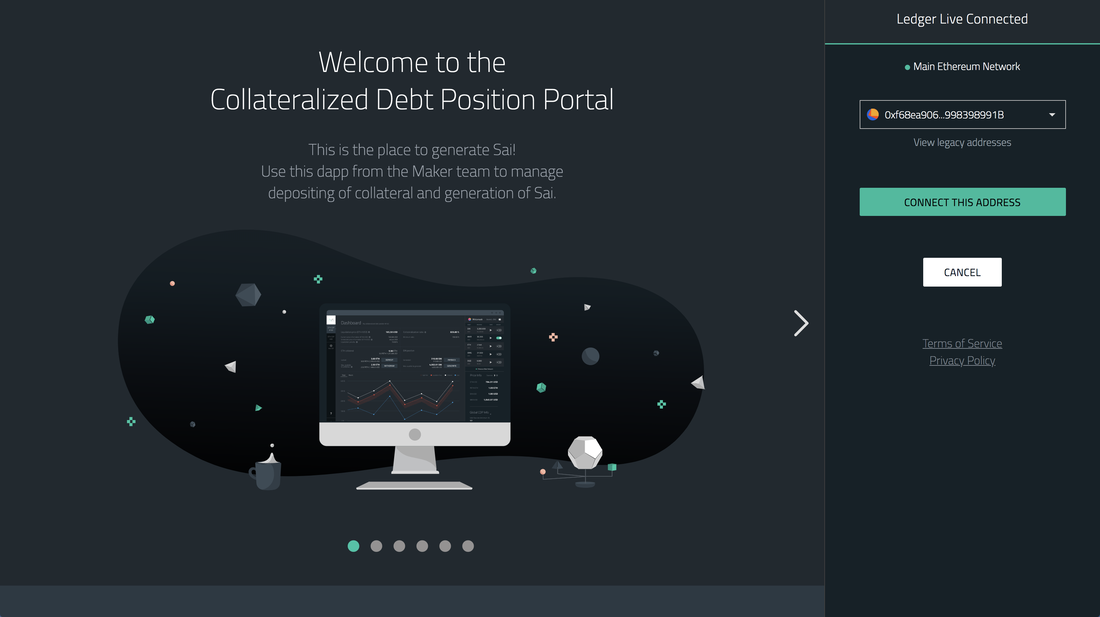 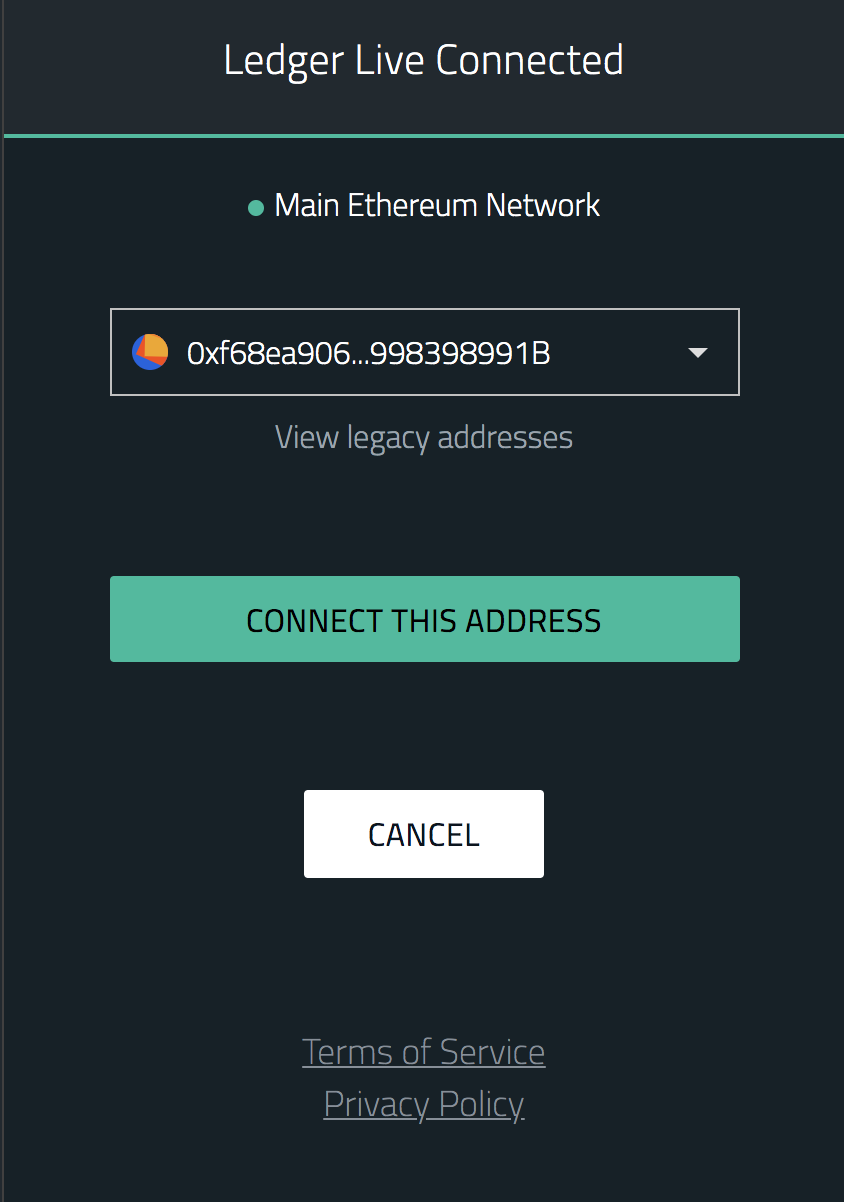  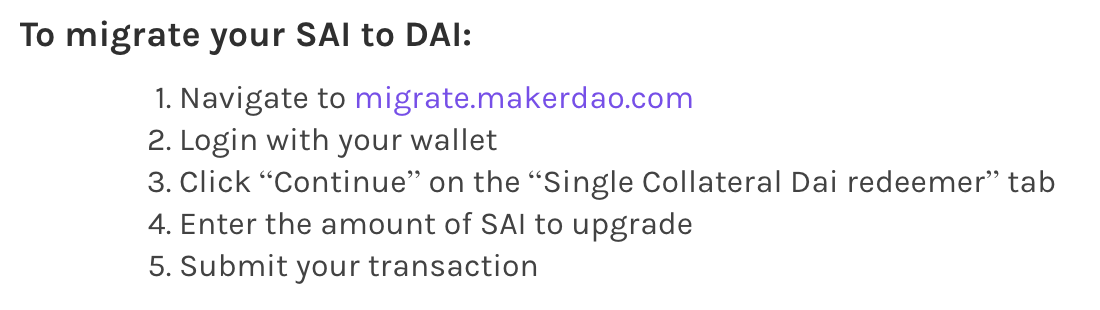 Information about SAI and DAI:
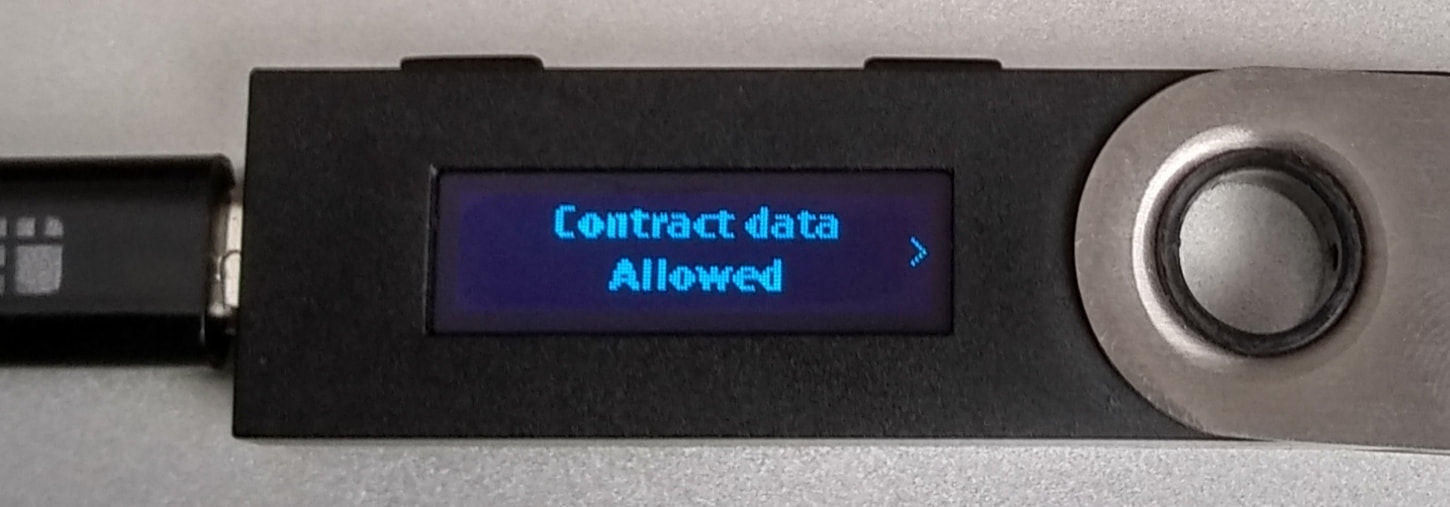
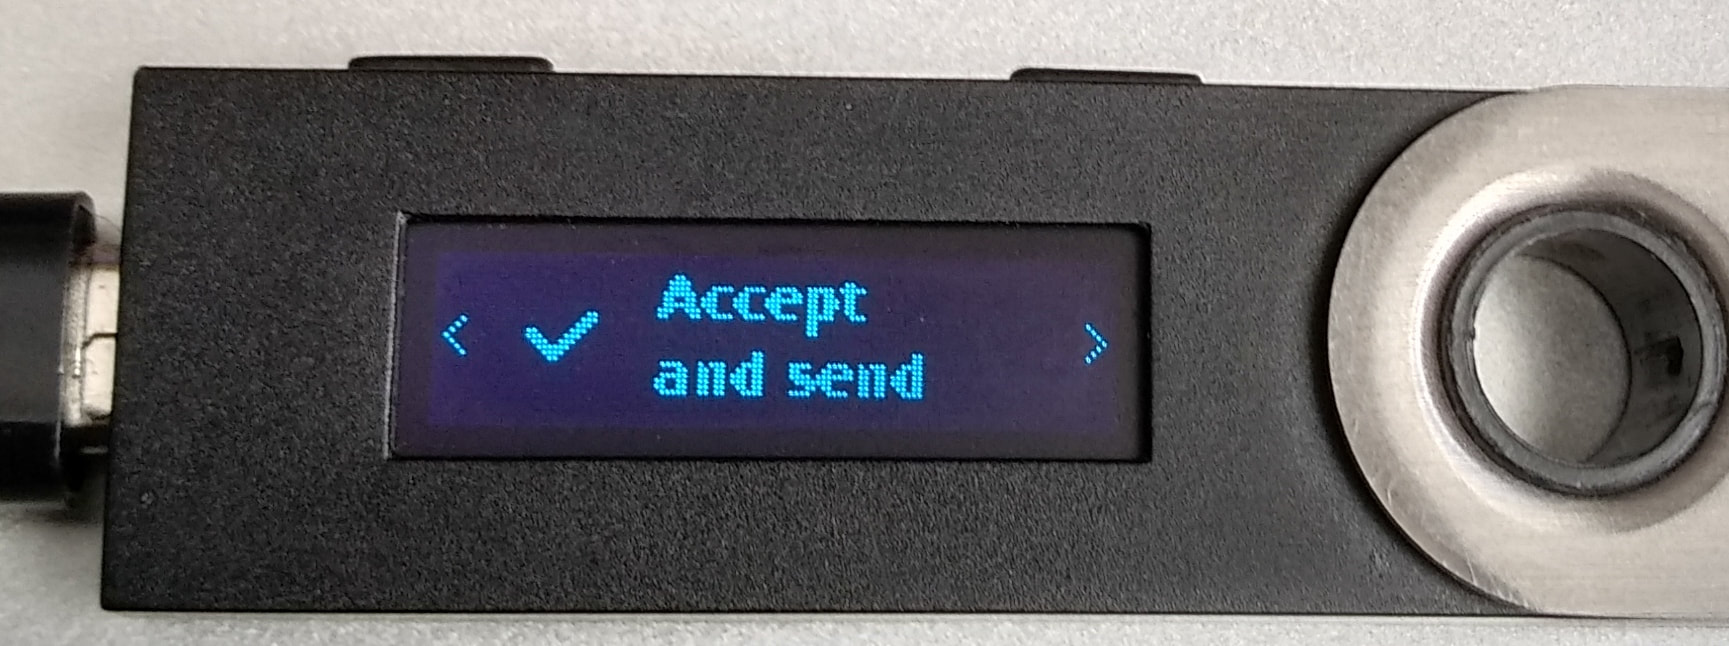
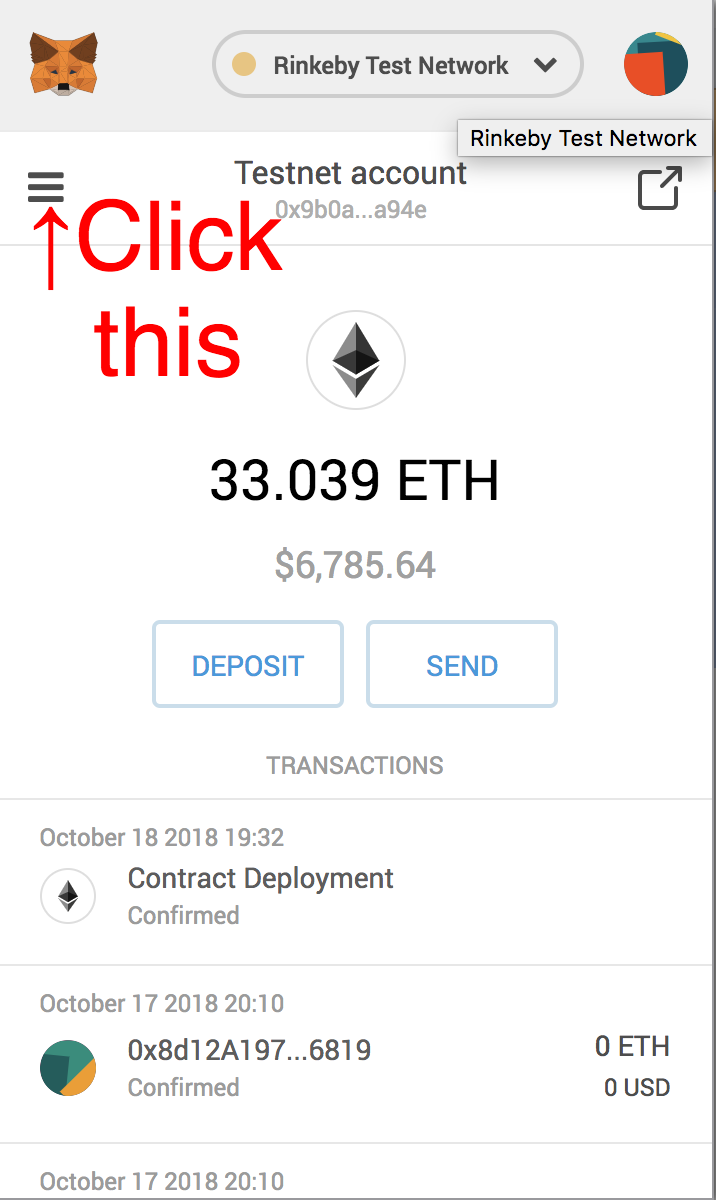
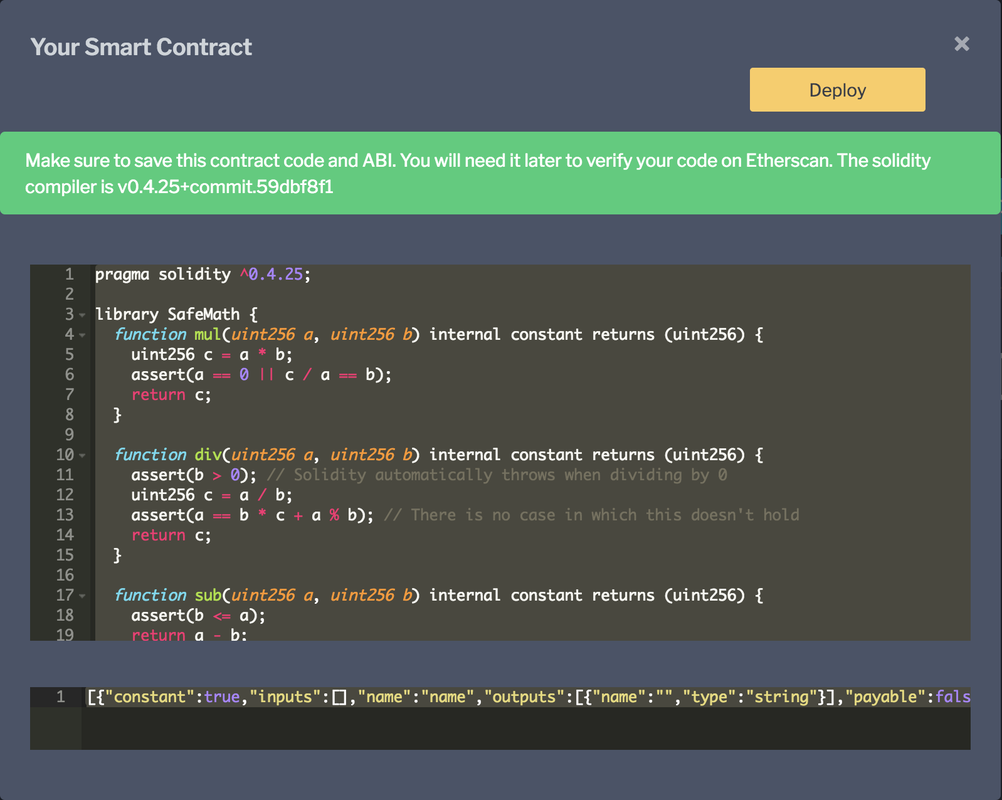
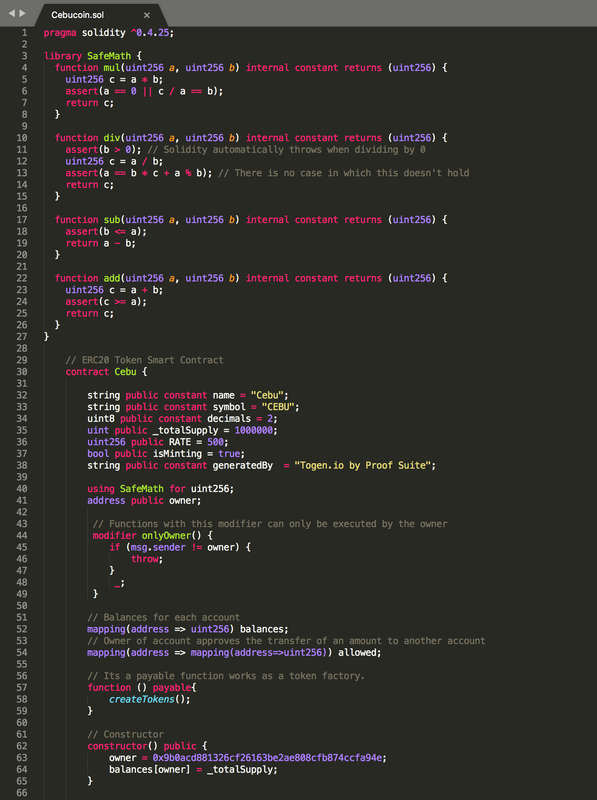
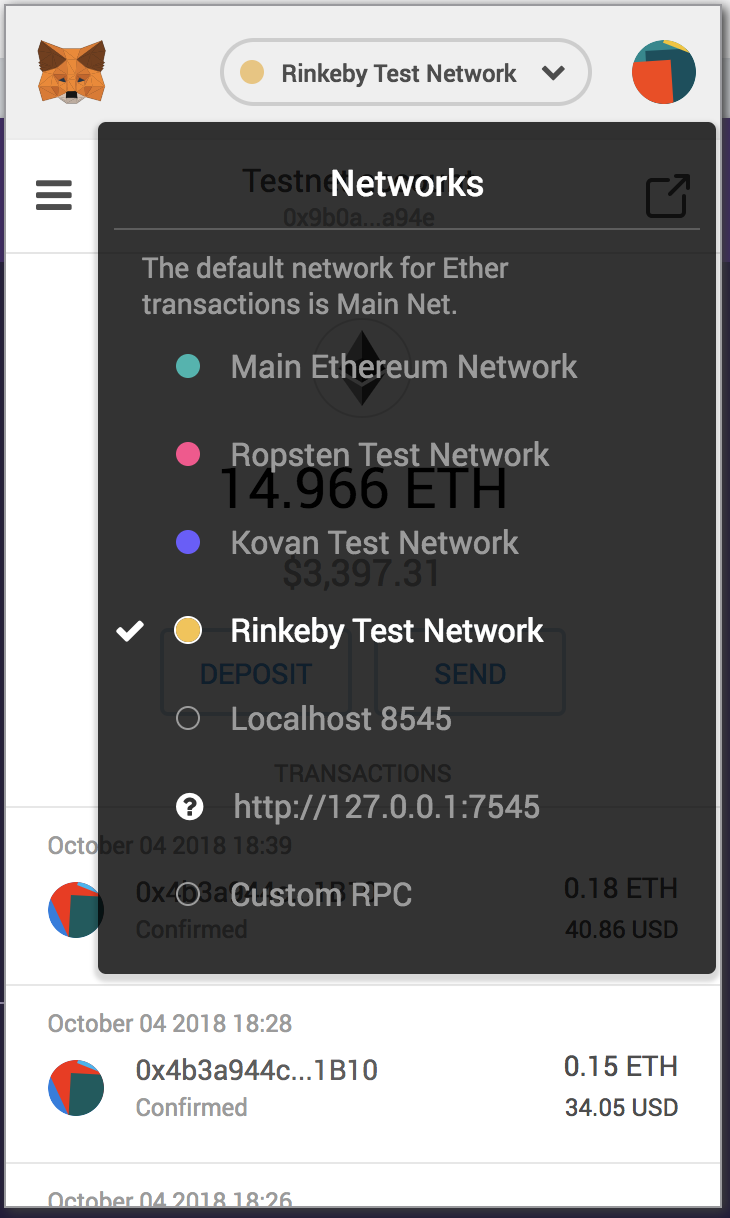
https://defipulse.com/blog/what-is-sai-where-is-my-dai-migrating-to-multi-collateral-dai/ This is a tutorial for how to acquire DAI and deposit to earn interest rate (However it is 0% currently due to DAI shortage. Maker website: https://makerdao.com/en/ 1: Go to: https://oasis.app/ and click "Borrow" and you will see the page below  3: Connect to your wallet I am connecting to ledger nano S in this tutorial. 4: Open Ledger and choose Ethereum app I assume you know how to use ledger nano S here. 4: Choose Ledger Legacy Note: Choosing ledger nano does not show the Ethereum address which I have some ETH even though unlocking and openings ledger live app. 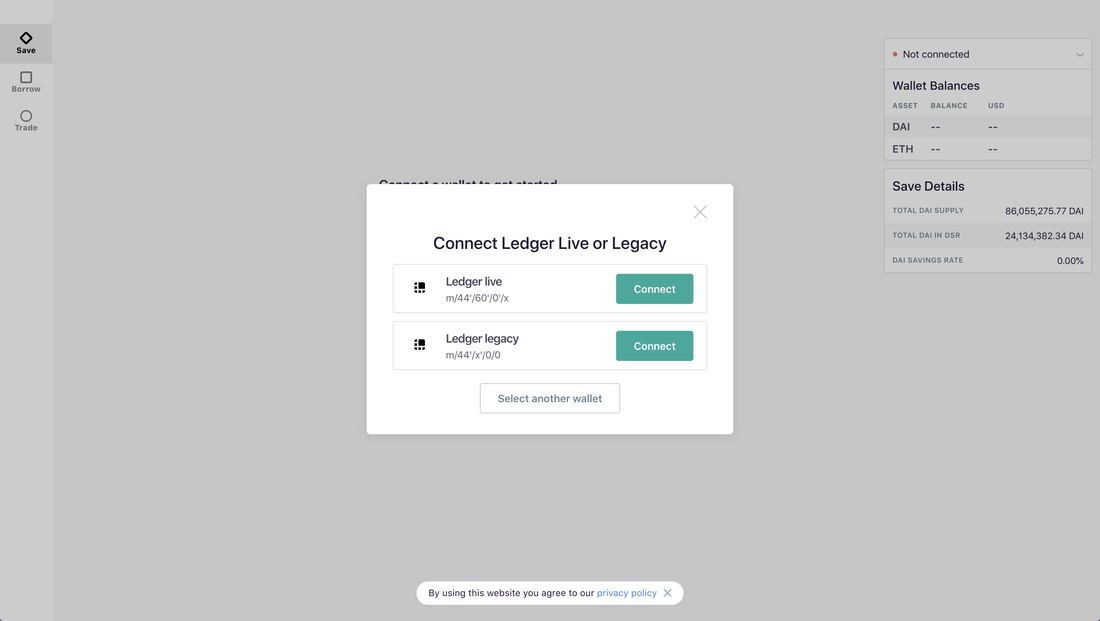 5: Create vault and deposit ETH to borrow DAI later This takes some time, follow the instruction by the app and (5): Make sure to your ETH app on ledger nano allows contract data which is in setting and choose click approve for each contract to execute such as "Deploy proxy" and "Set allowance".   6: You will see the window below, skip it for now  This is what looks like now.  7: Borrow DAI Click "Get started" and choose ETH-A in the next page. You can also choose BAT and USDC 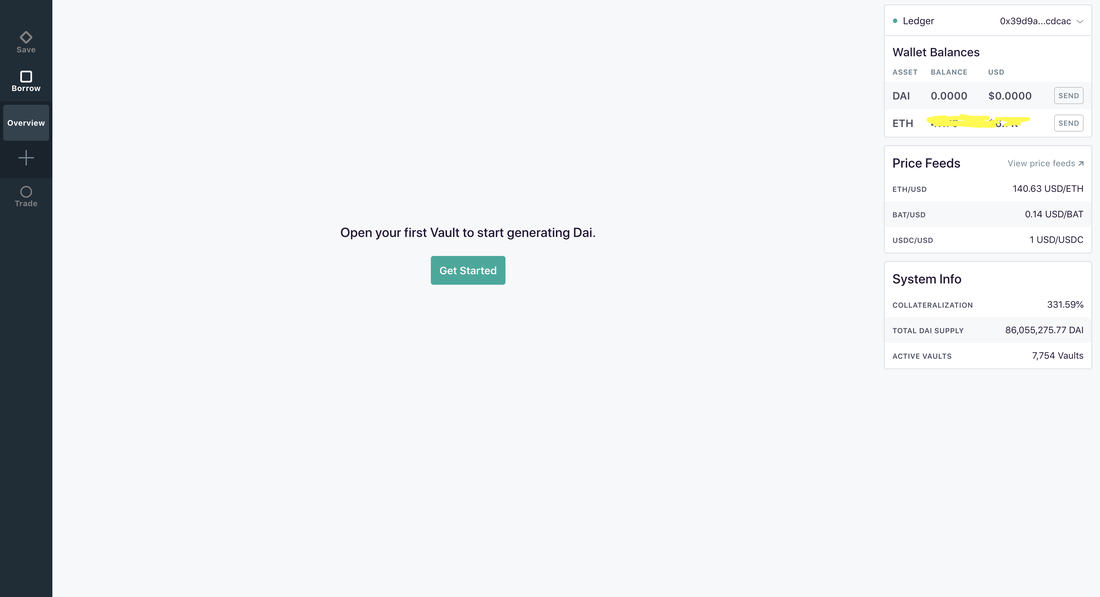 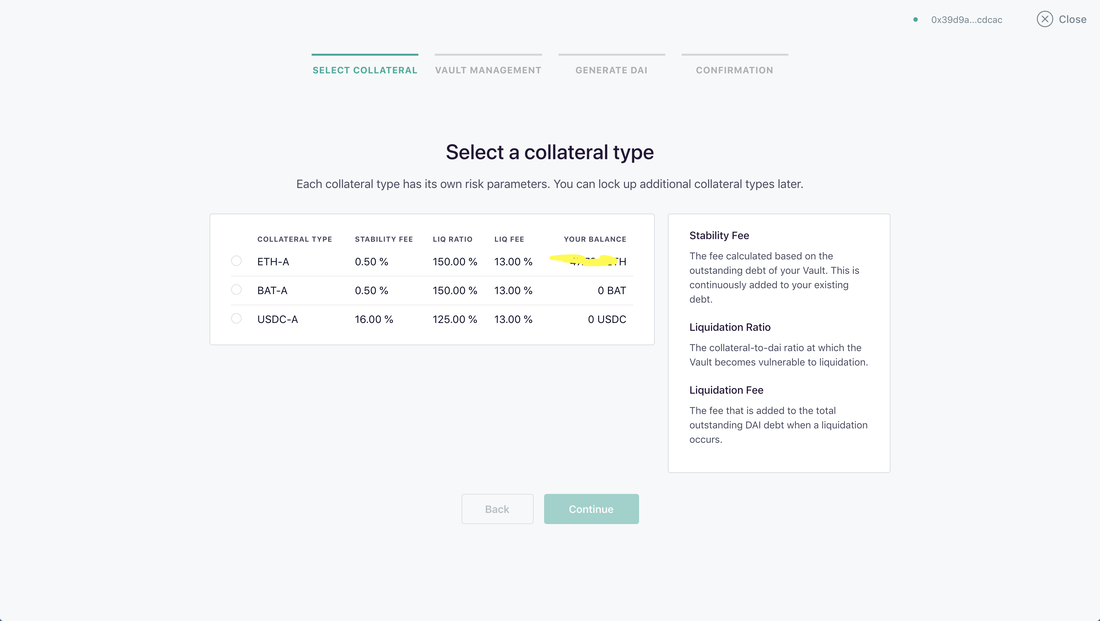 8: Decide how much to borrow based on liquidation risk Make sure that current ETH price and liquidation price is not close. I chose 10ETH (1400USD= current ETH price of Apr 2020, 140USD x 10) collateral and 500 DAI to borrow and the liquidation price is 75USD/ETH. 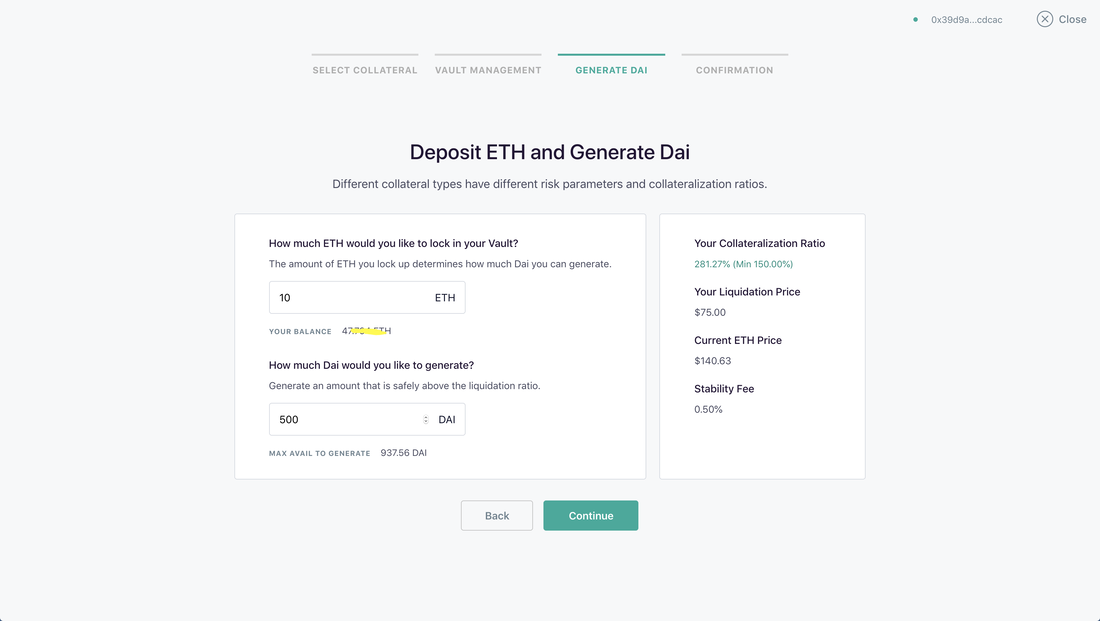 9: Now the vault is created and the detail below 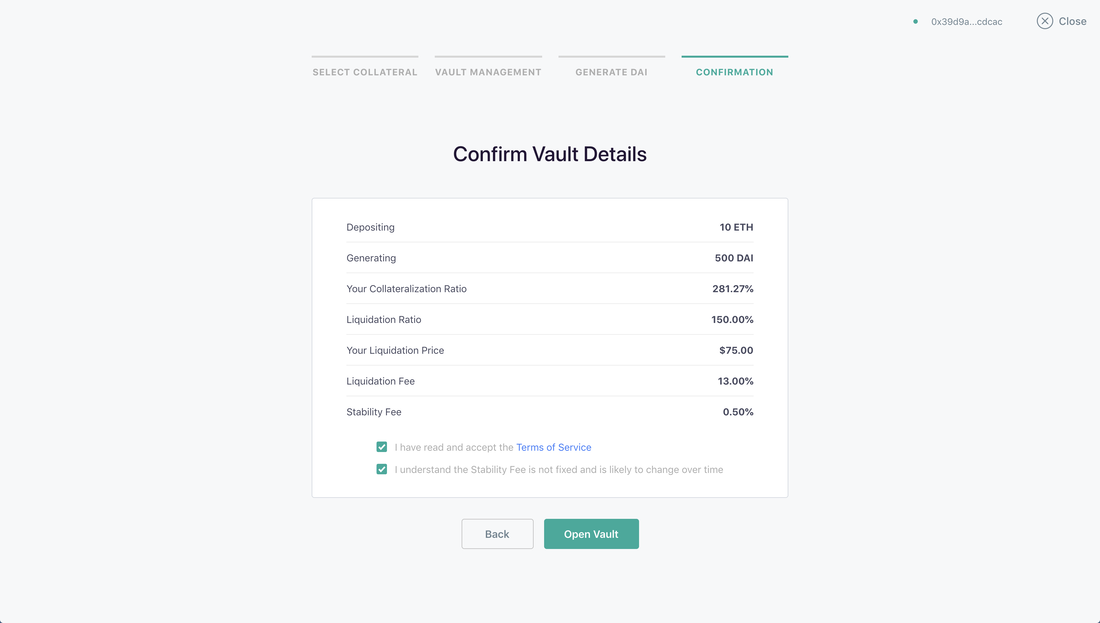 This is the overview below. You can see that liquidation penalty is 13% of the collateral. 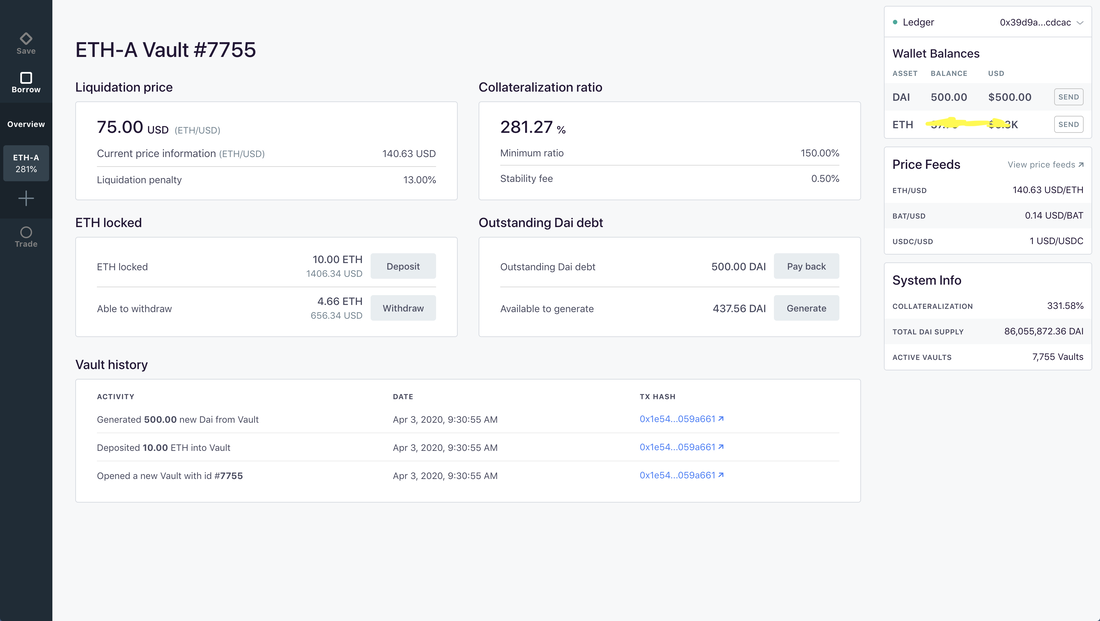 10: Deposit DAI (Note that it is not a good idea to borrow DAI and and and save the DAI as there is 0% interest rate for deposit and you will be paying interest by borrowing. Borrowing rate per day as of now = 500 USD => 500.014309258276524579 USD) Deposit and choose the amount. However DAI is having an issue currently and the interest rate is 0% (It is about 8% previously), lower the stability rate is 0.5%. Please see for more information from the link below. https://defirate.com/maker-dai-shortage/ 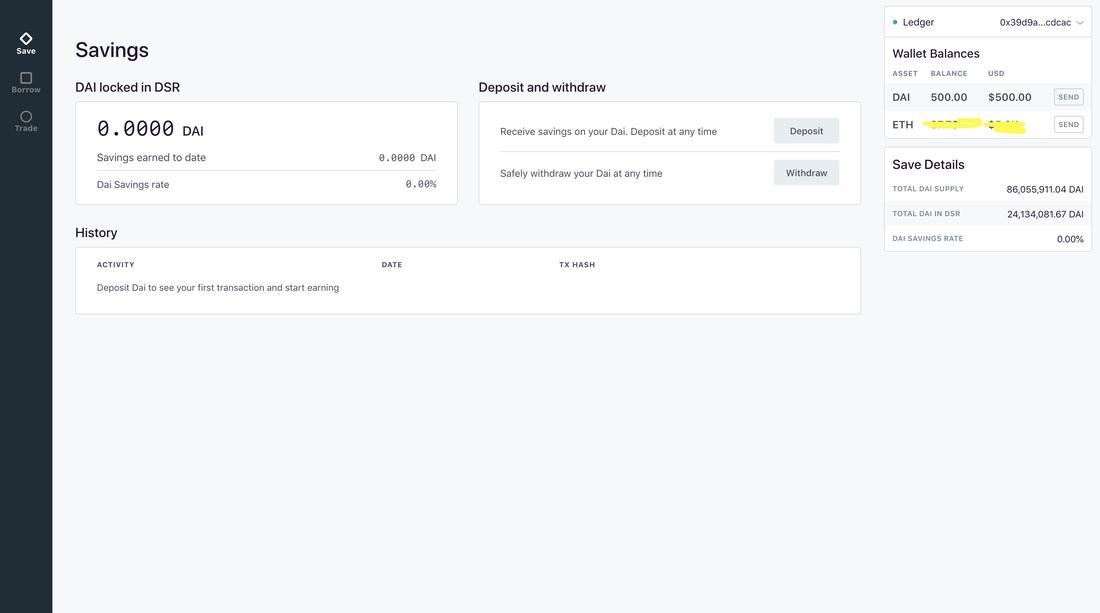 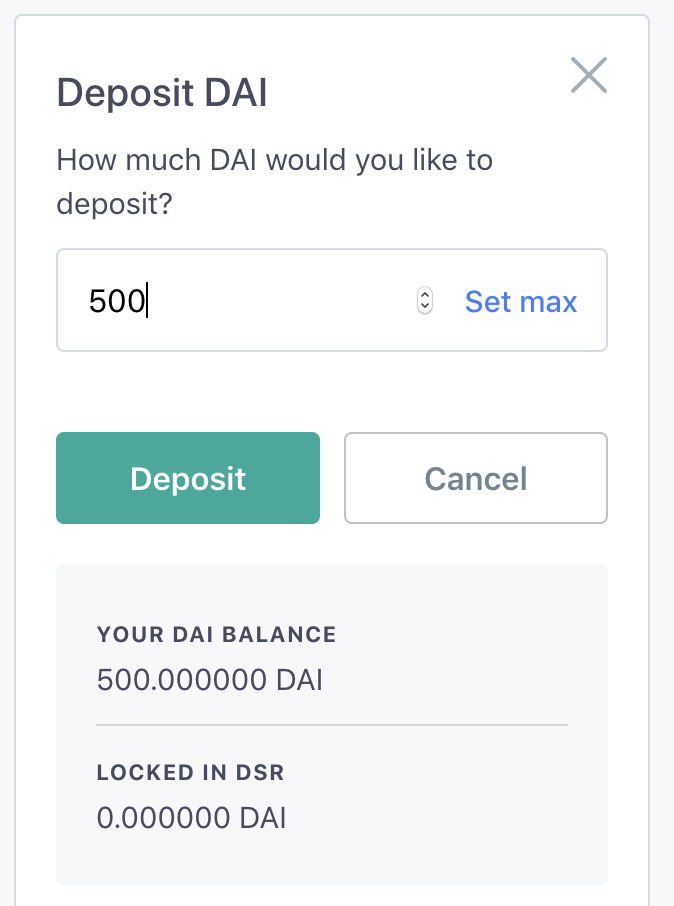 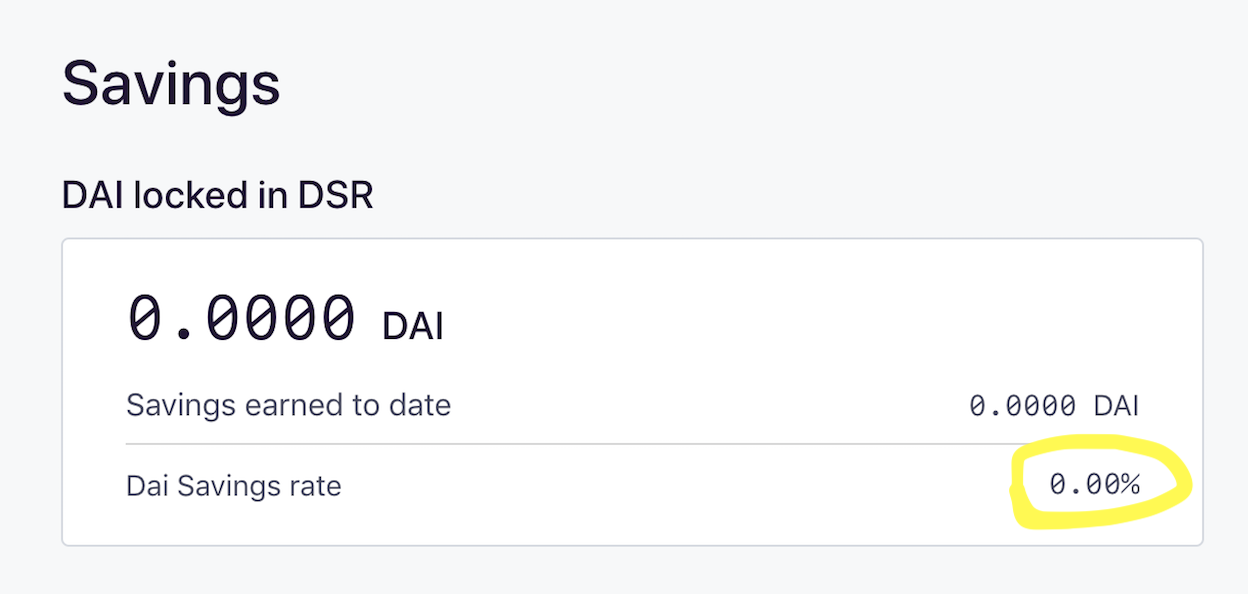 The overview looks like this now. 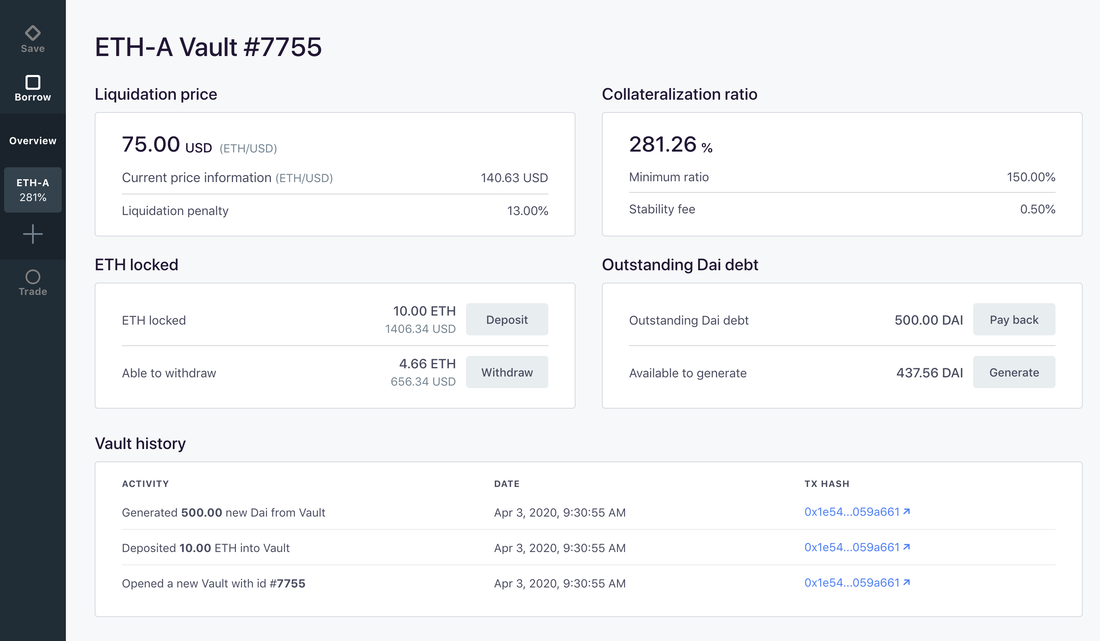 Case study: Liquidation Liquidation Penalty = 0.13 (13%) Amount of collateral ETH = 10 Current ETH Price = 140.634 USD Liquidation price = Amount of DAI borrowed * 1.5/ Amount of collateral = 75 USD Amount of DAI borrowed = 500 USD Collateralization ratio = Amount of ETH * ETH Price/ Amount of DAI borrowed = 140.634*10/500 = 2.81268 Collateralization ratio > 1.5 Liquidation, lets say collateral auction did not go well, just enough to cover the borrowed amount in other word lose all the collateral. I should have some left over back to my vault though this is the worst case scenario. Collateral price = Amount of collateral ETH * ETH Price = 1406.34 USD If liquidate I have 500 USD of DAI If I bought ETH with the borrowed DAI Amount of DAI borrowed / ETH Price * 75 = 266.65 If I did not borrow in the first place Amount of collateral ETH * Liquidation price = 750 Potential leftover = Amount of collateral ETH * Liquidation price * (1 - Liquidation Penalty) - Collateral price sold at auction = 652.5 - Collateral price sold at auction For more detail: https://community-development.makerdao.com/ 11: Close vault First you need to pay back the DAI debt by pressing "Pay back" button. If you do not have enough DAI and you will need to buy some from exchange or "Trade" function in the Oasis app if it is small amount. This is a walkthrough of Oasis trade: https://www.btcjp.co/research/maer-oasis-trade-function 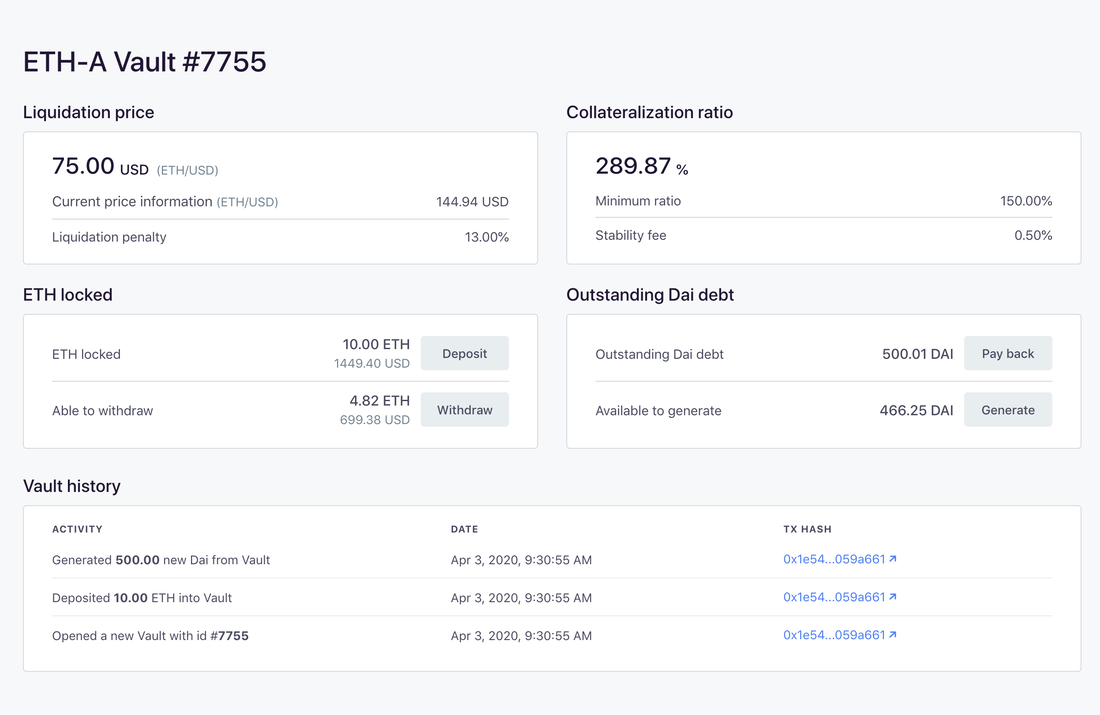 Withdraw the deposited ETH 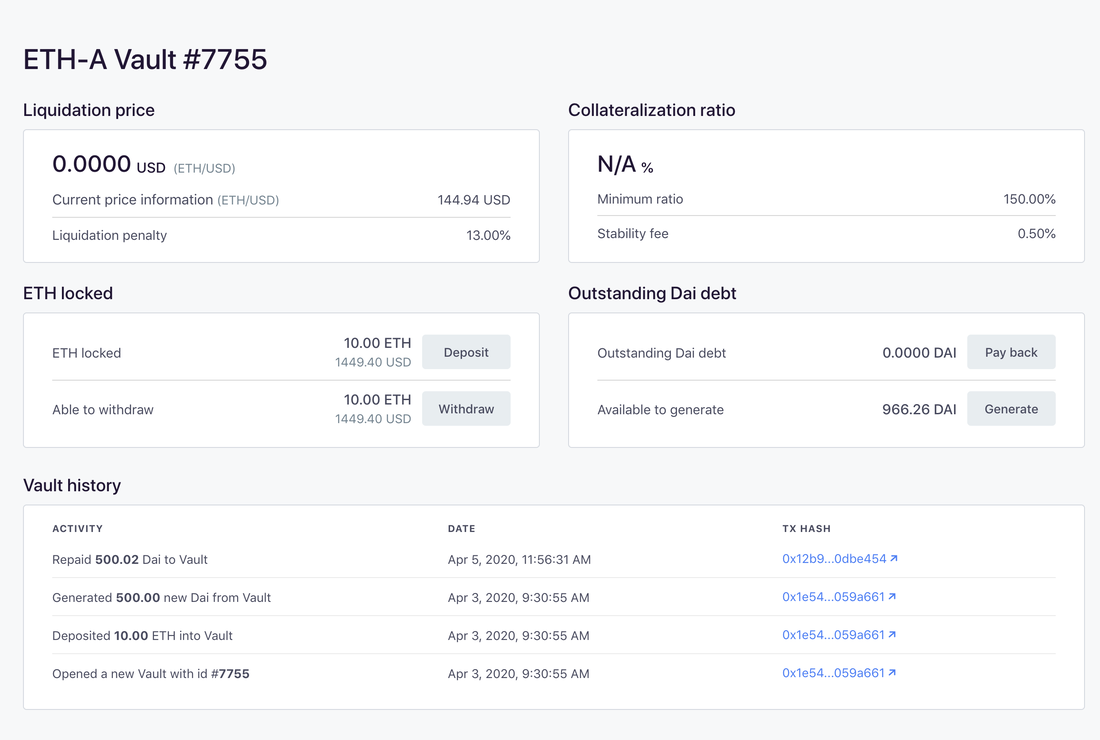 Done! 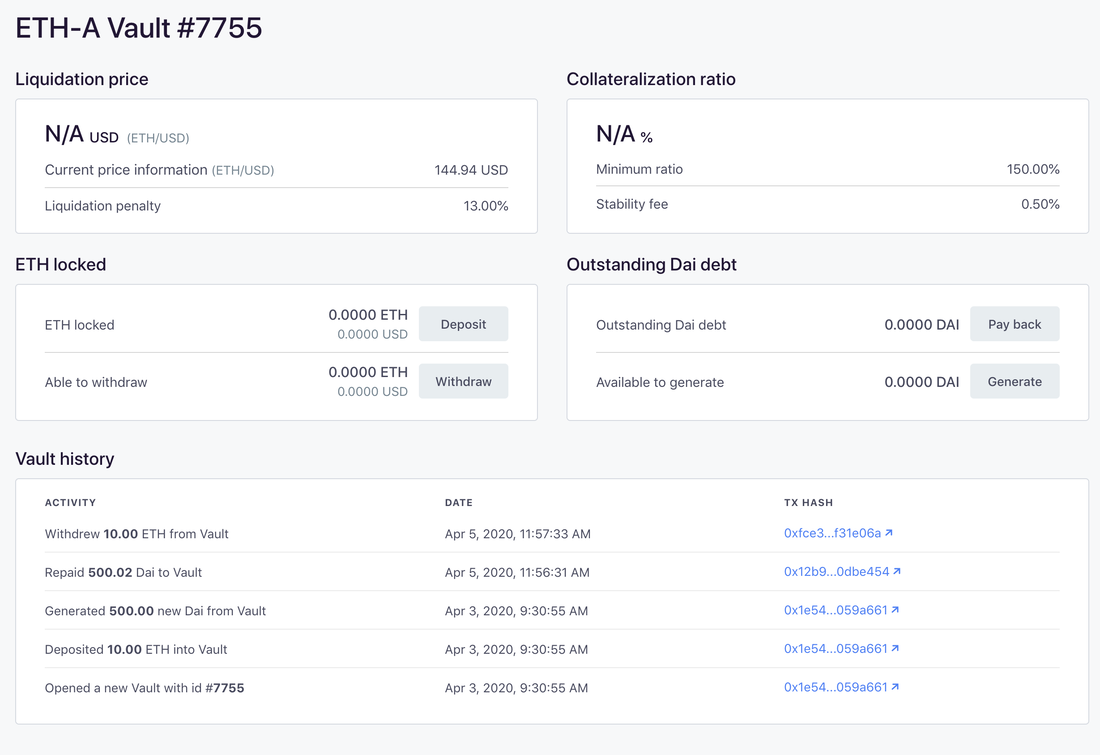 Introducing Blockstack Bitcoin network application How to start https://blockstack.org/install I am using browser web as easy to install. 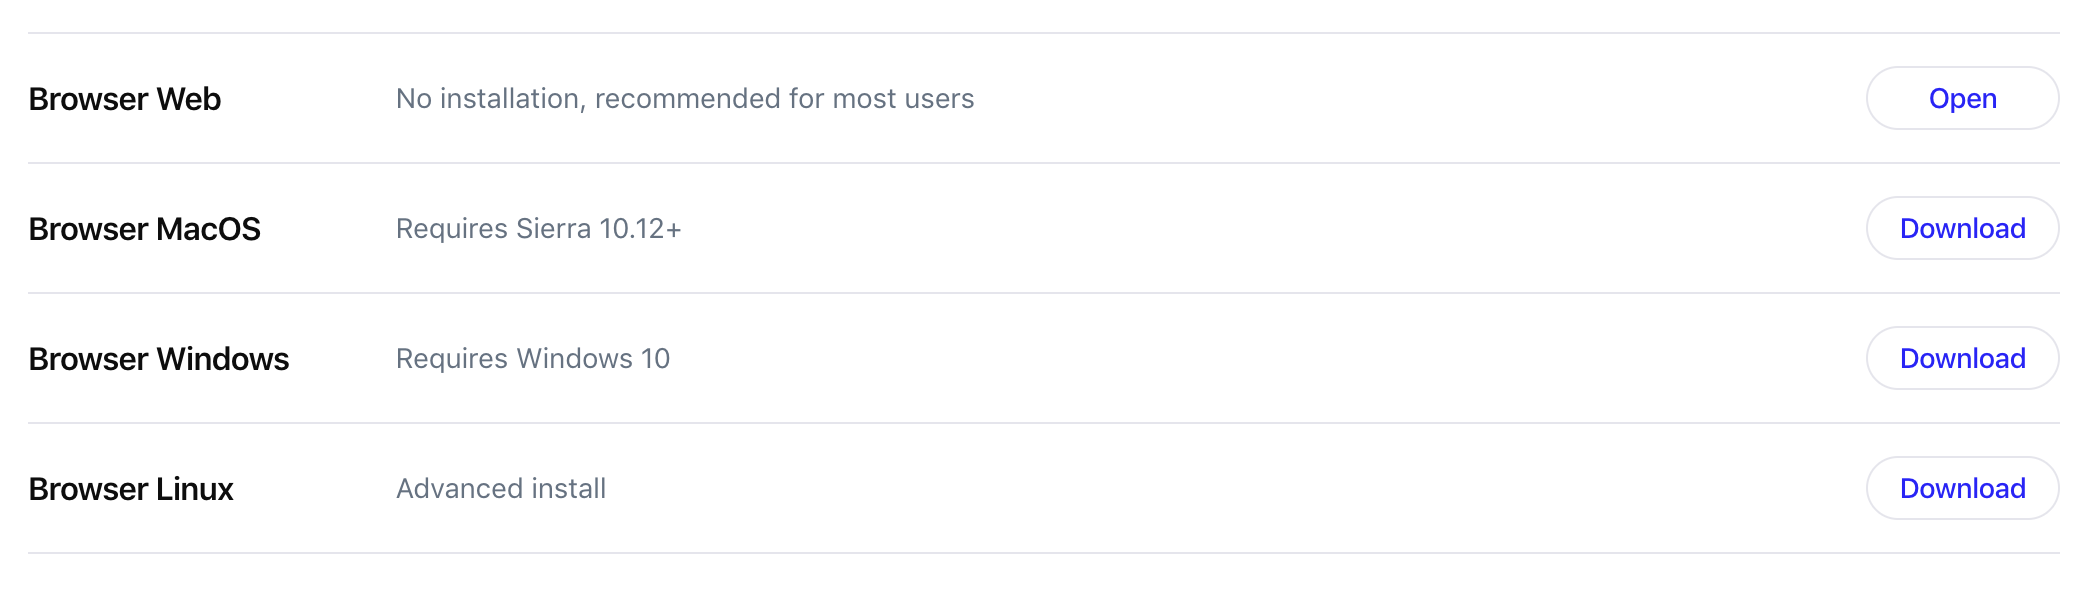 Home screen below 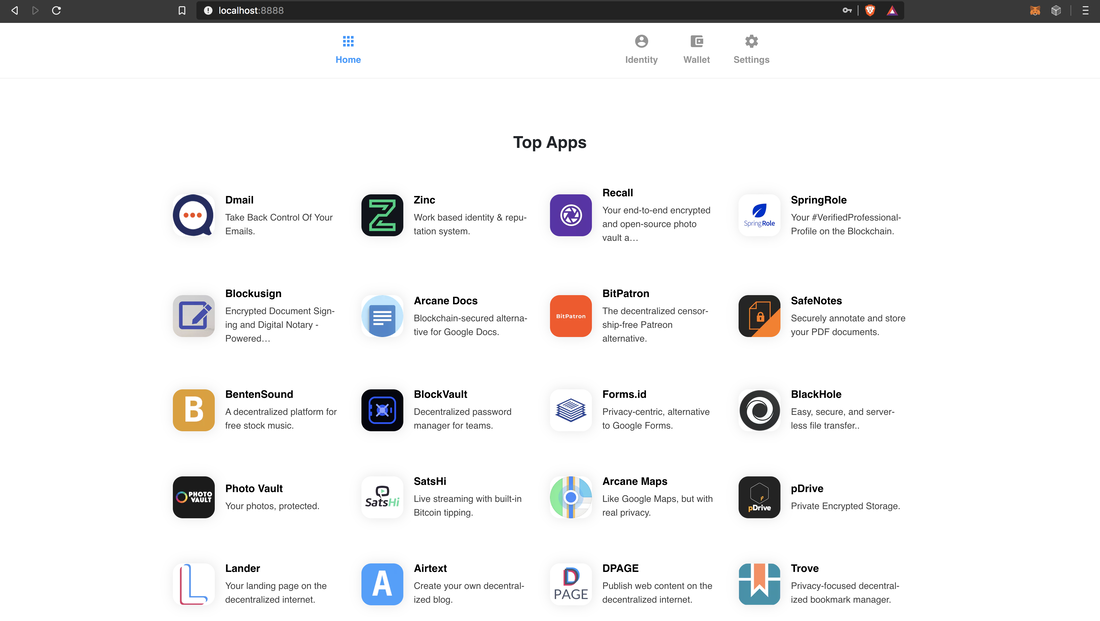 My account tells me to renew the ID (created about 2 years ago) so that I am going to show you how it went below. It is free to use if your id is xxxxx.blockstack 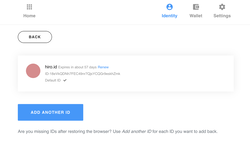 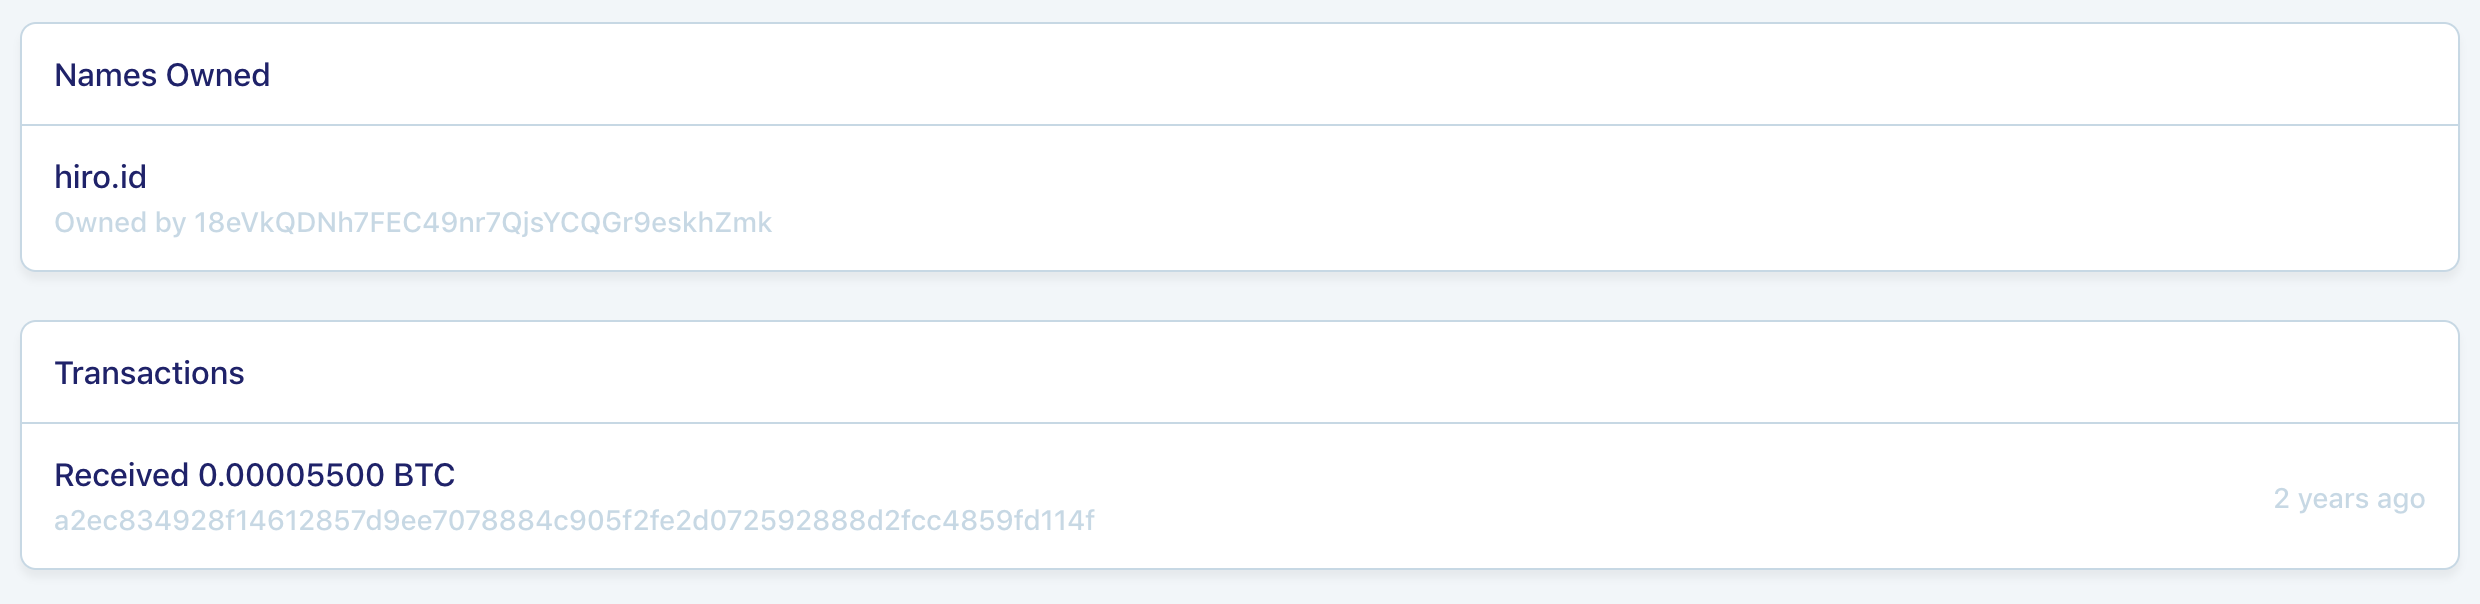 The ID renewal costed 0.001768 = 16.1 USD 0.0000252 network fee = 0.23USD Segwit address to non-Segwit, it took only few seconds for the transaction! (1BTC = 9133USD as of March 7 2020) It is probably cheaper than paying for a domain and email per account for traditional corporate web email service but it is free to regular use of @gmail.com. 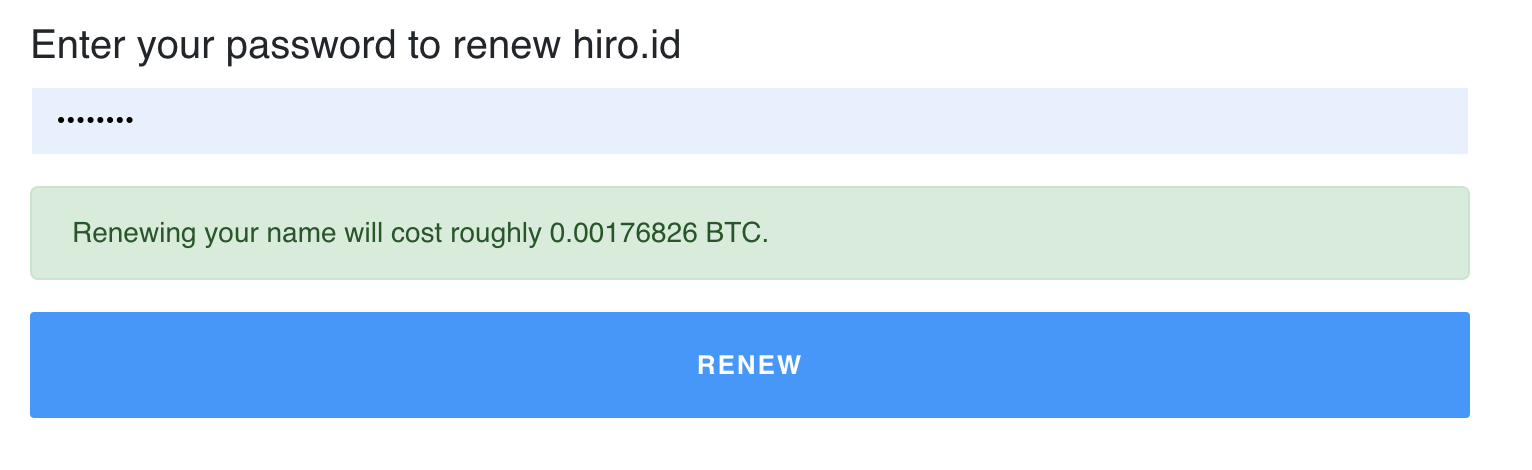  After update, 673 days of extension (730-57)  Gmail like UI and easy to use. There is also D-Drive which file can be saved. I have to say it is extremely slow, it took me over 10 seconds to load existing folders. 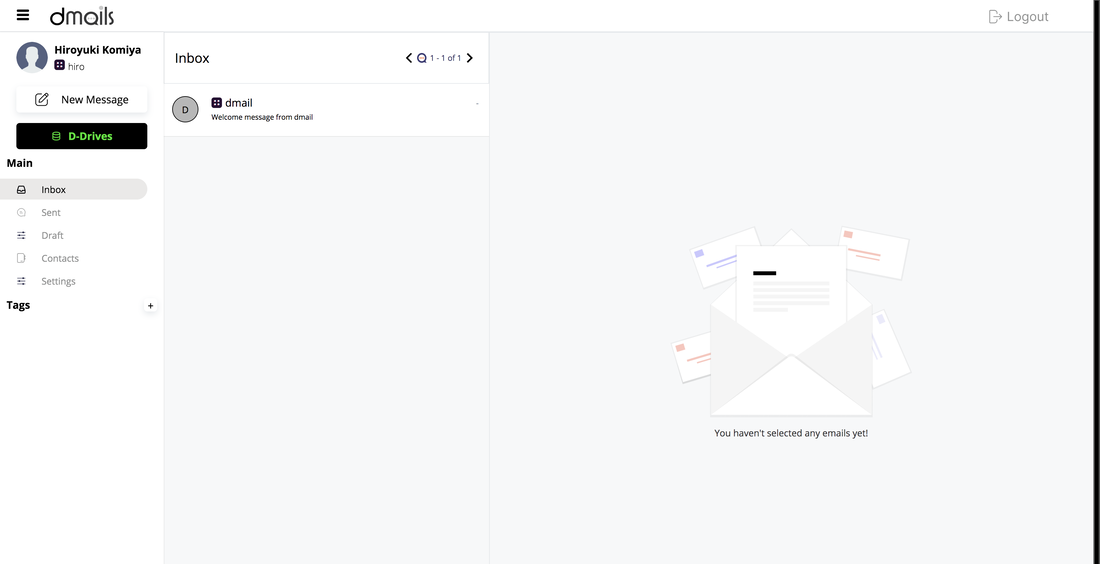 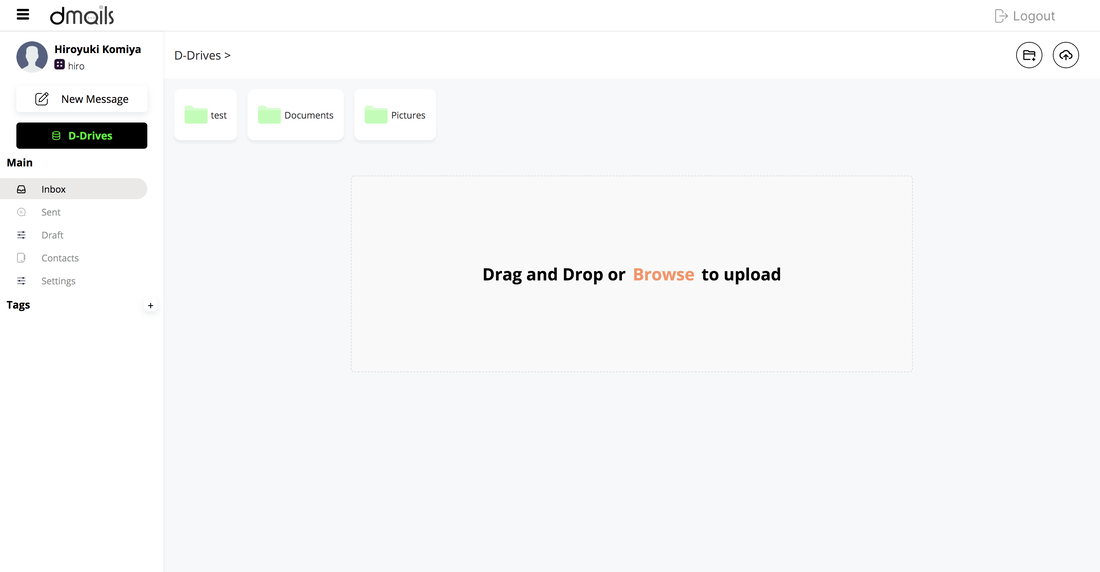 I can't see this will replace existing email service but can be used something. Let's see. Please send me a message to hiro.idLibra testnet on Linux (Kali linux) 1: Github Link https://github.com/libra/libra 2: Open terminal and install CLI git clone https://github.com/libra/libra.git 3: Launch testnet cd libra git checkout testnet 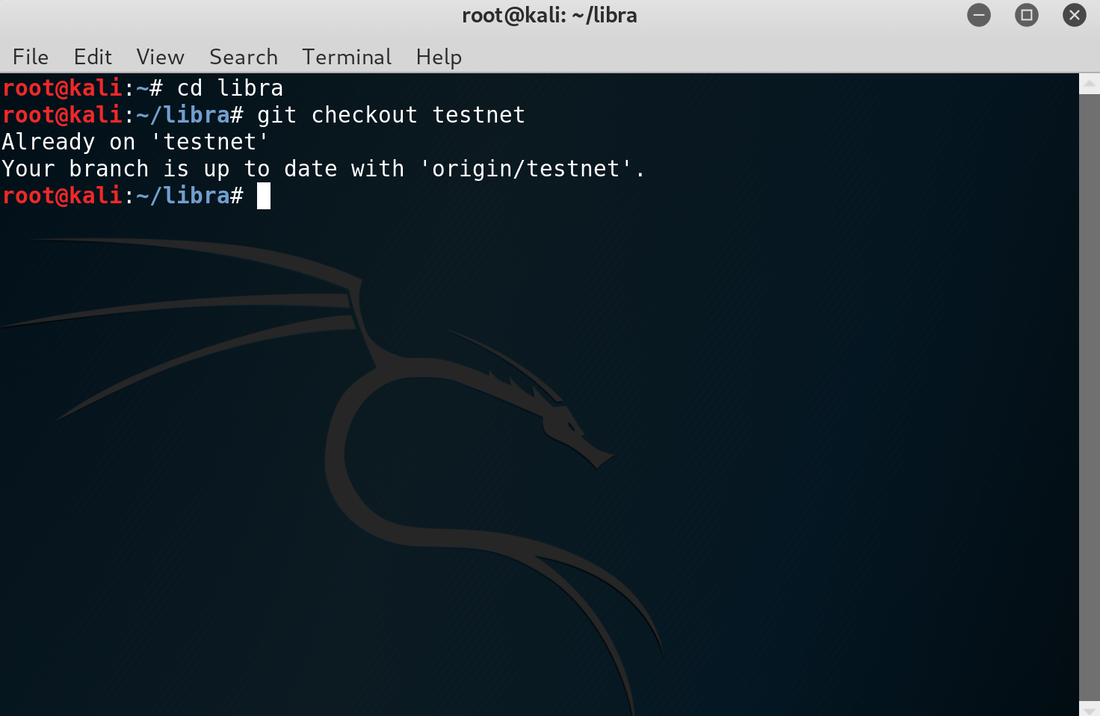 I have done it before so that terminal displays as above 4: Installing dependencies, this takes several minutes depending on your network ./scripts/dev_setup.sh 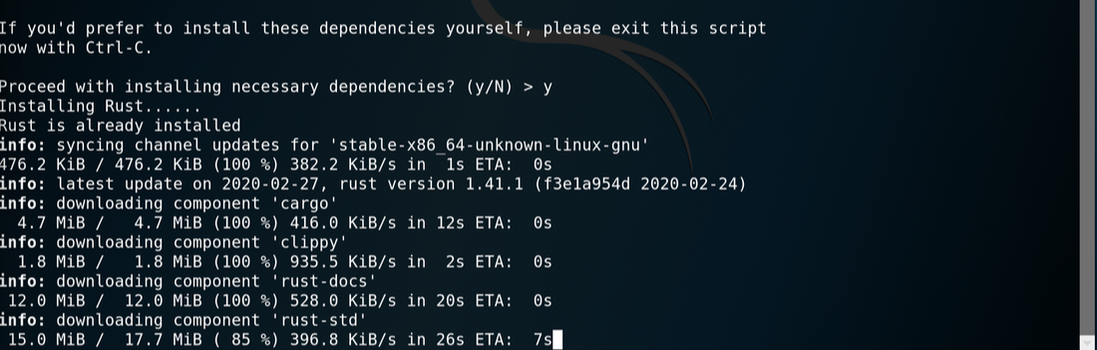 (5): Start CLI (This attempt showed error) ./scripts/cli/start_cli_testnet.sh 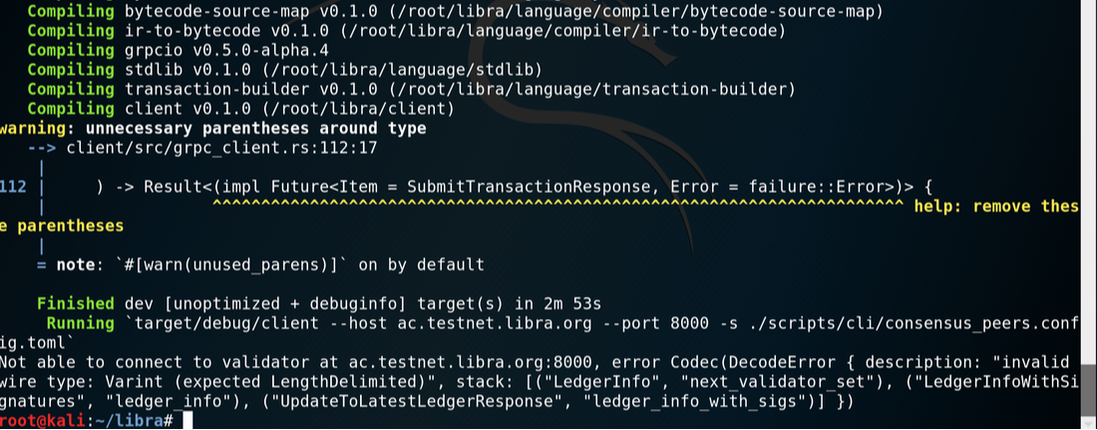 As you can see and also as I expected it appeared error. I deleted existing Libra folder and reinstalled by step 2 - 4. (I have installed Libra November 2019 and can still see quite updates on the Github repository, no surprise it didn't launch after 5 month of updates) 5: Start CLI ./scripts/cli/start_cli_testnet.sh (It took me about 20 mins) 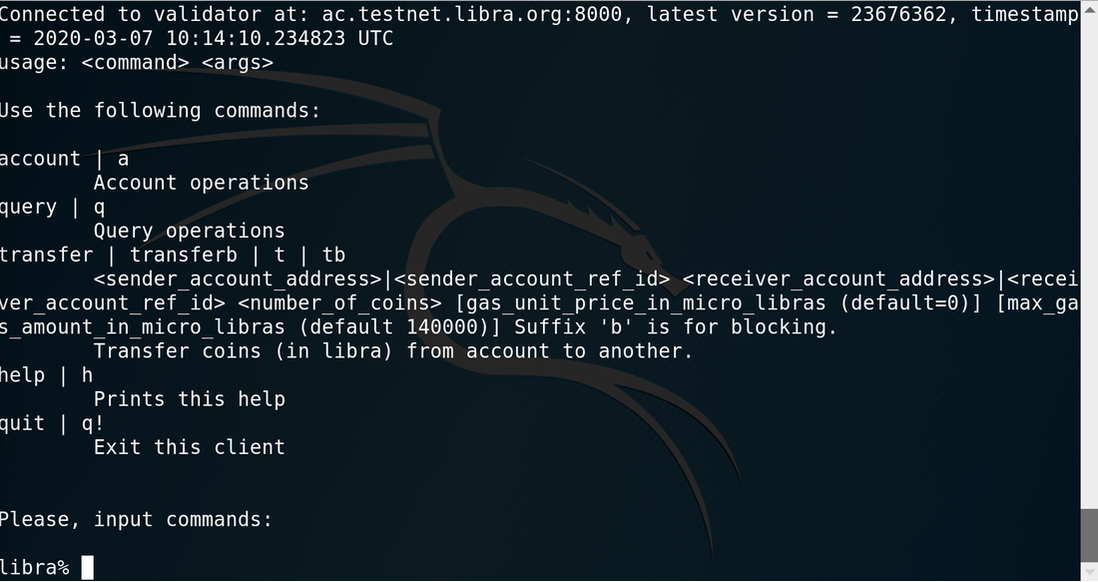 6: Use Libra with CLI Help command below  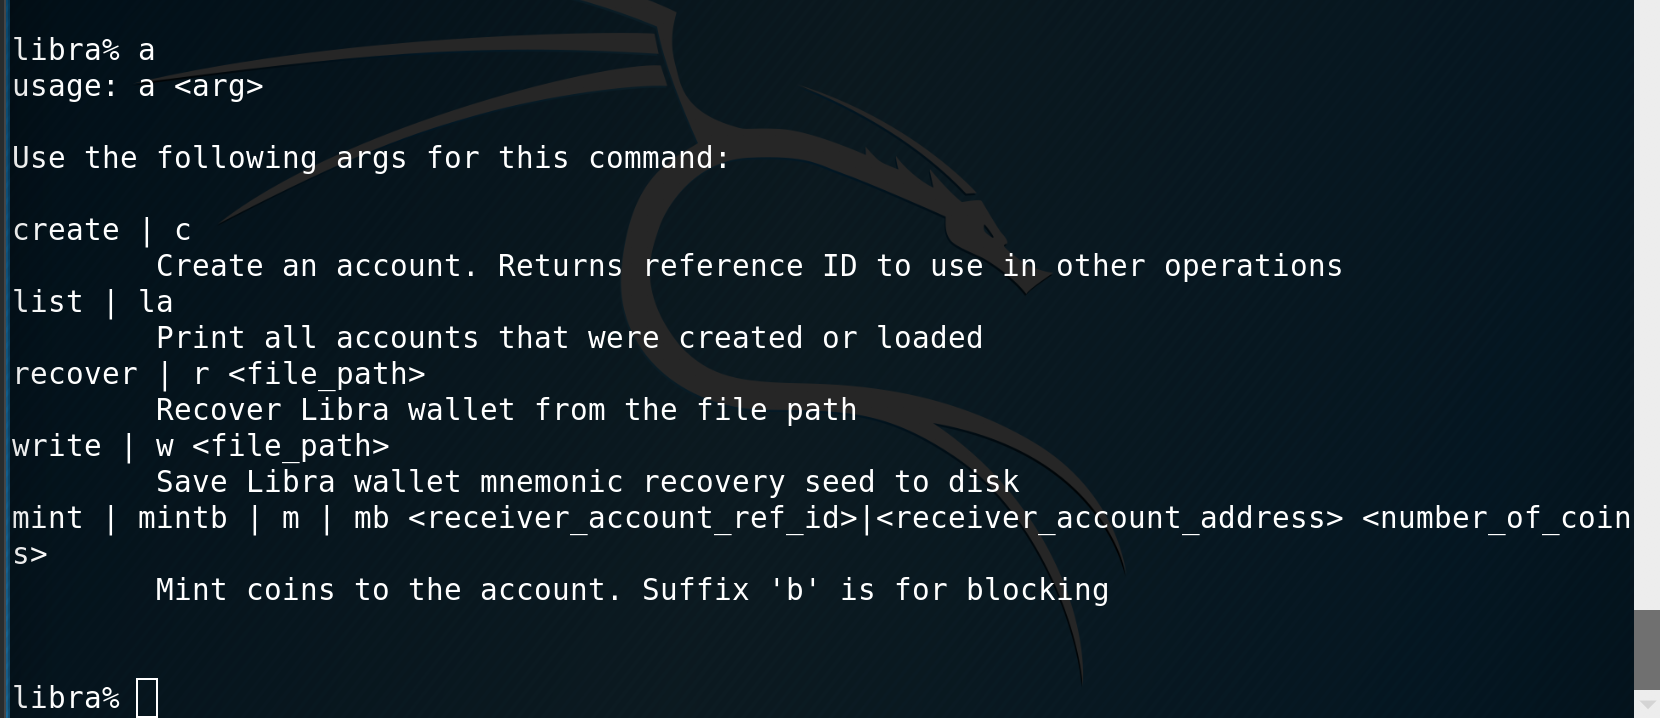 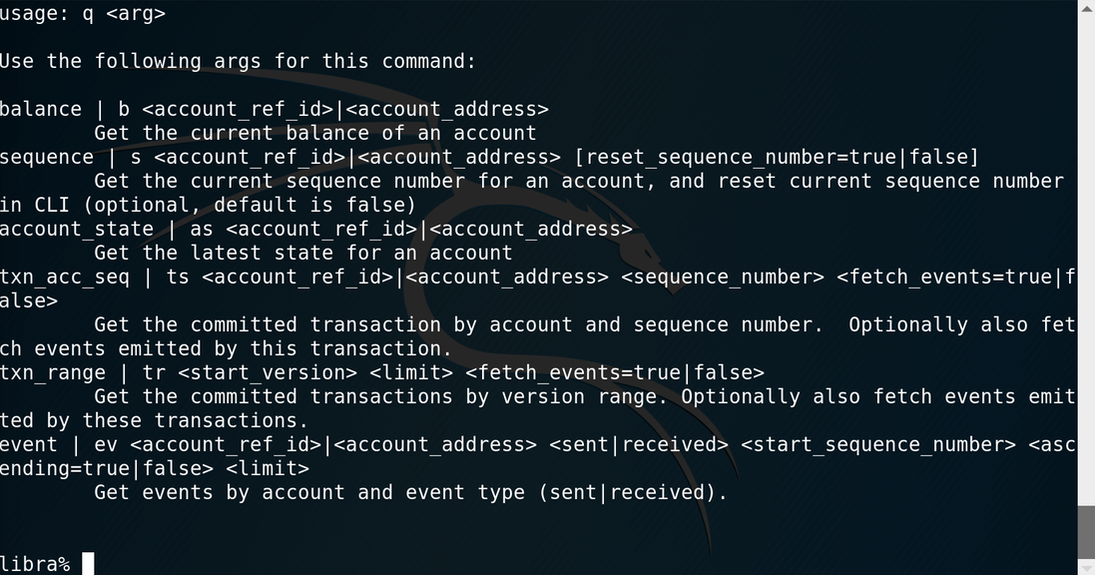 7: Libra CLI sample What I did below is 1: account create 2: account list //to check account number = index 0 and address as shown below 3: account mint 0 100 // minted 100 coins at account 0 4: query balance 0 // check account 0 to see 100 coins 5: create account // created again so that I can send the coins 6: account list // now you can see 2 accounts 7: transfer 0 1 30 // transferred 30 coins account 0 to account 1 8: query balance 0 // to check balance 9: query balance 1 // to check balance 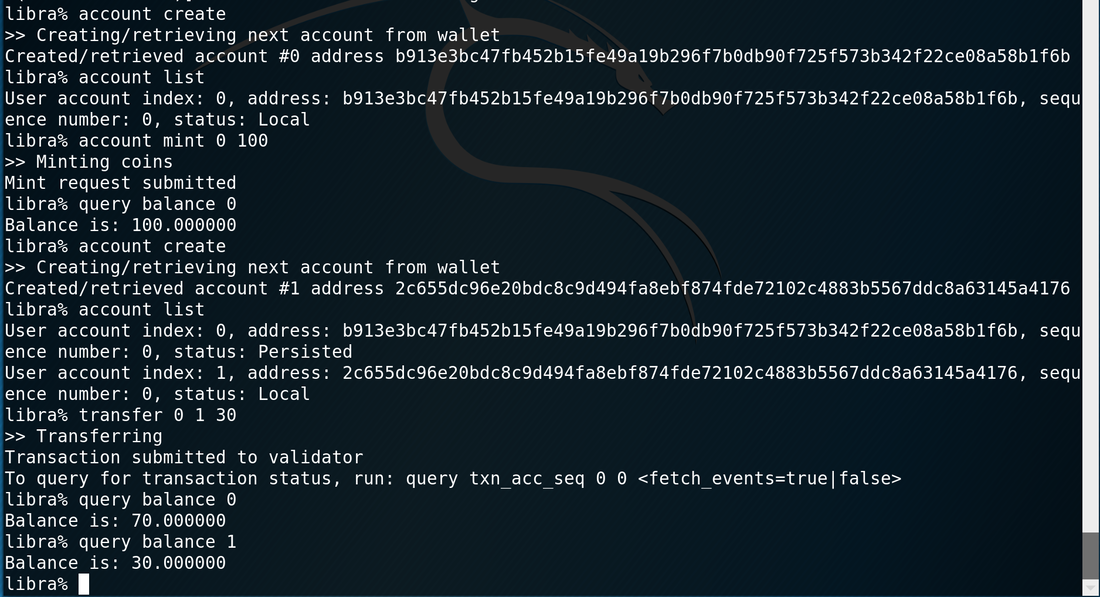 It is simple to use and built with Rust. It seems secure with the limited function and the security of Rust language. Libra project isn't hyped as much as before but it is still actively updated on Github as of today, March 7 2020.  This is how to setup account to testing an application between computers via custom RPC network. 1: Go to https://console.kaleido.io/login?refAction=homepage-top-nav 2: Create an account for free. Here is the instruction link below. https://www.youtube.com/watch?v=EJEVqHHzQ2U&t=708s  3: Sign-in, it should look like below and click your institute. 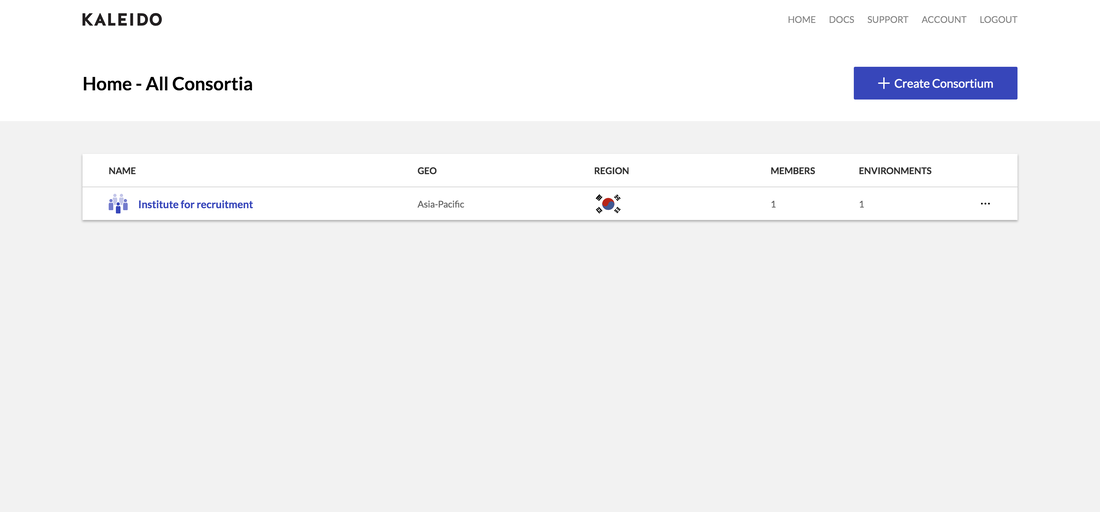 4: Create node and add services you want. I created 3 nodes for no reason, there are usefull services such as IPFS file sharing. 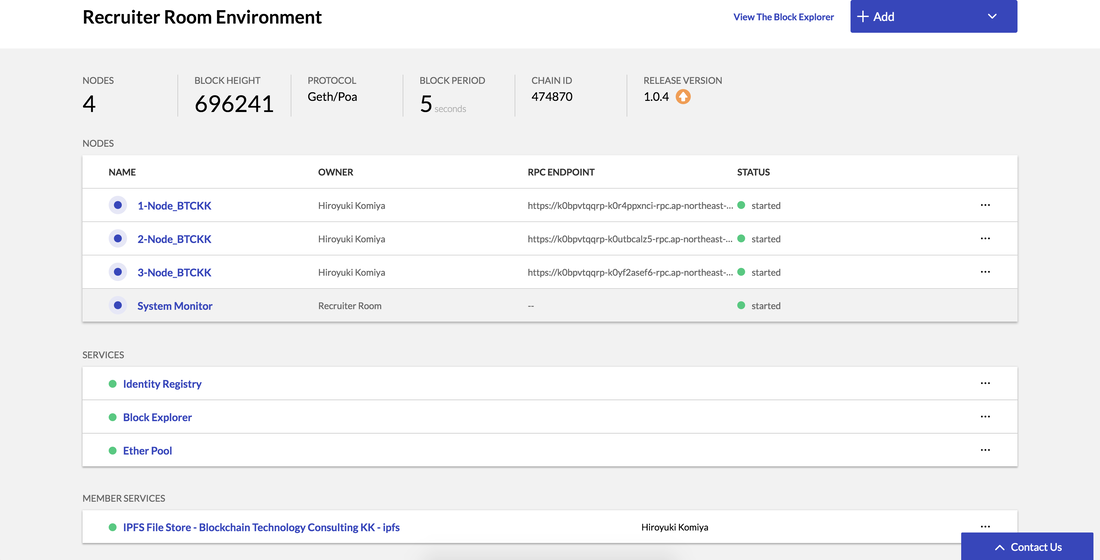 5: Add New App Credentials and click one of your node to connect to Metamask (If you don't know Metamask and please check my previous post). Copy the password, you will need to connect to the node. 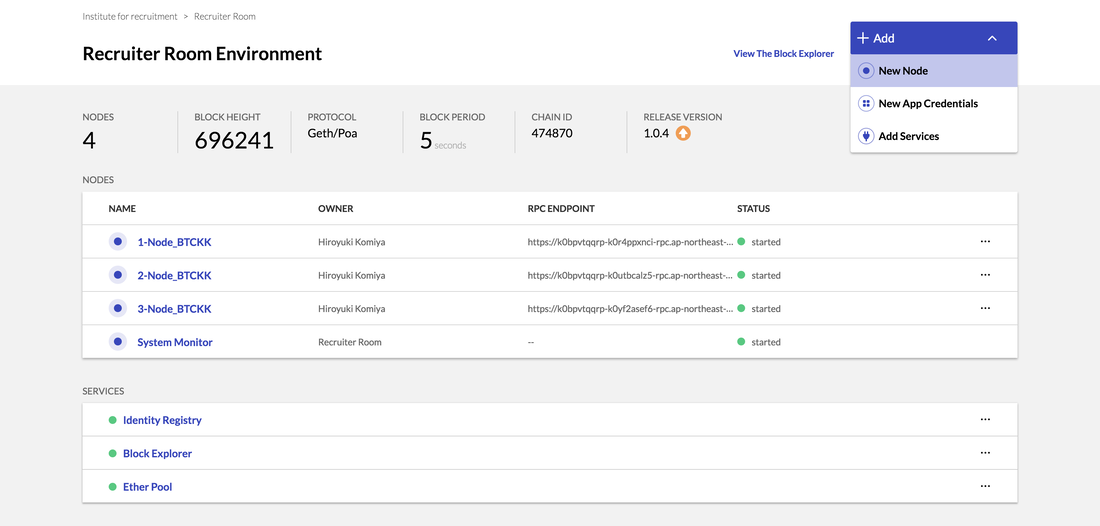 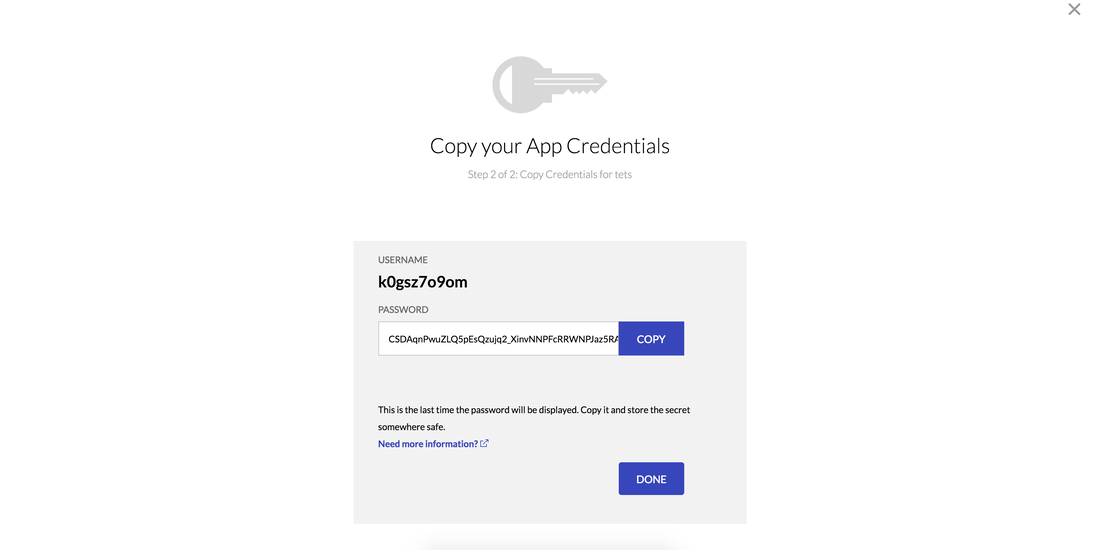 6: Click one of the node, scroll down and click "Connect Node". 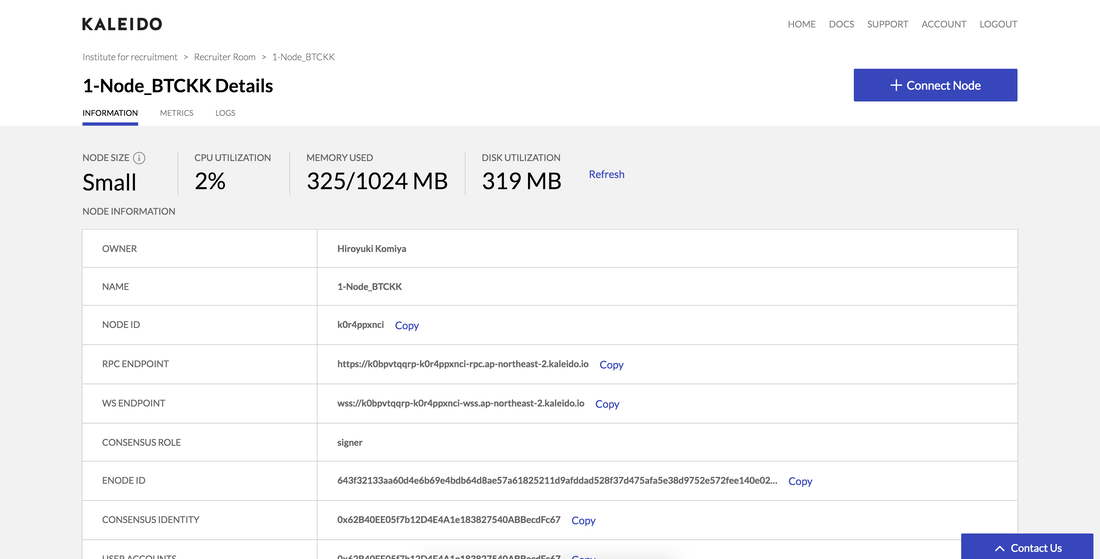 7: Choose native JSON/ RPC, choose the credential name and paste the password you copied. 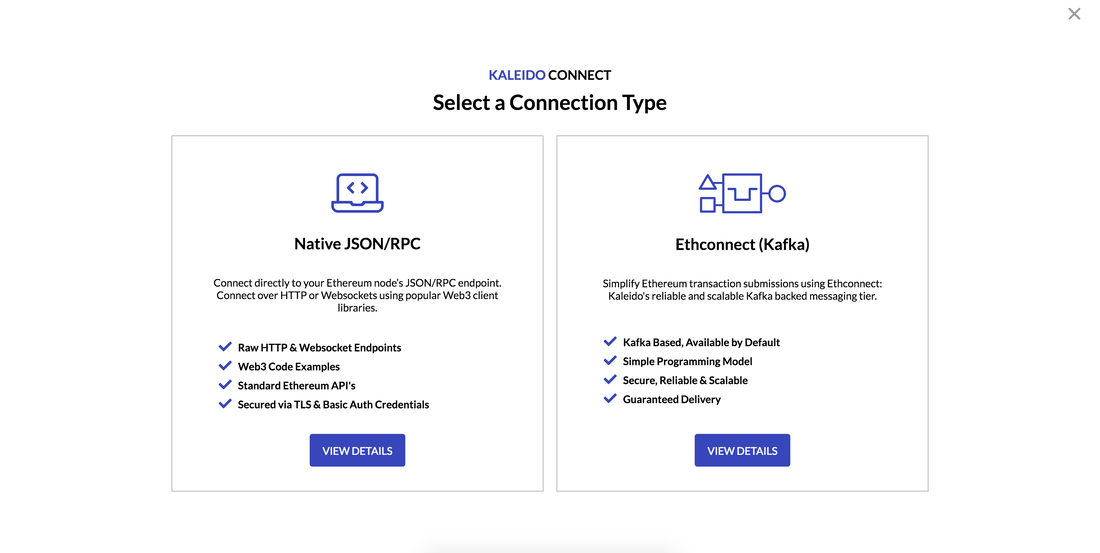 8: You should be seeing this page below. CONNECTION URL (at the bottom) is the link you need to connect via metamask. So copy the link. 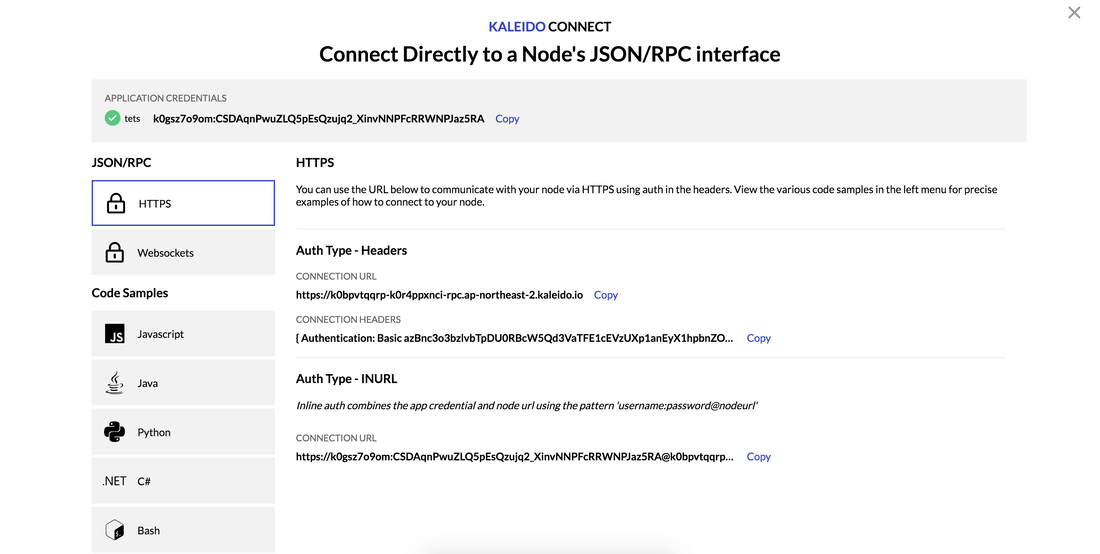 9: Signin metamask and click Networks which is at the top of the window. And click custom RPC. 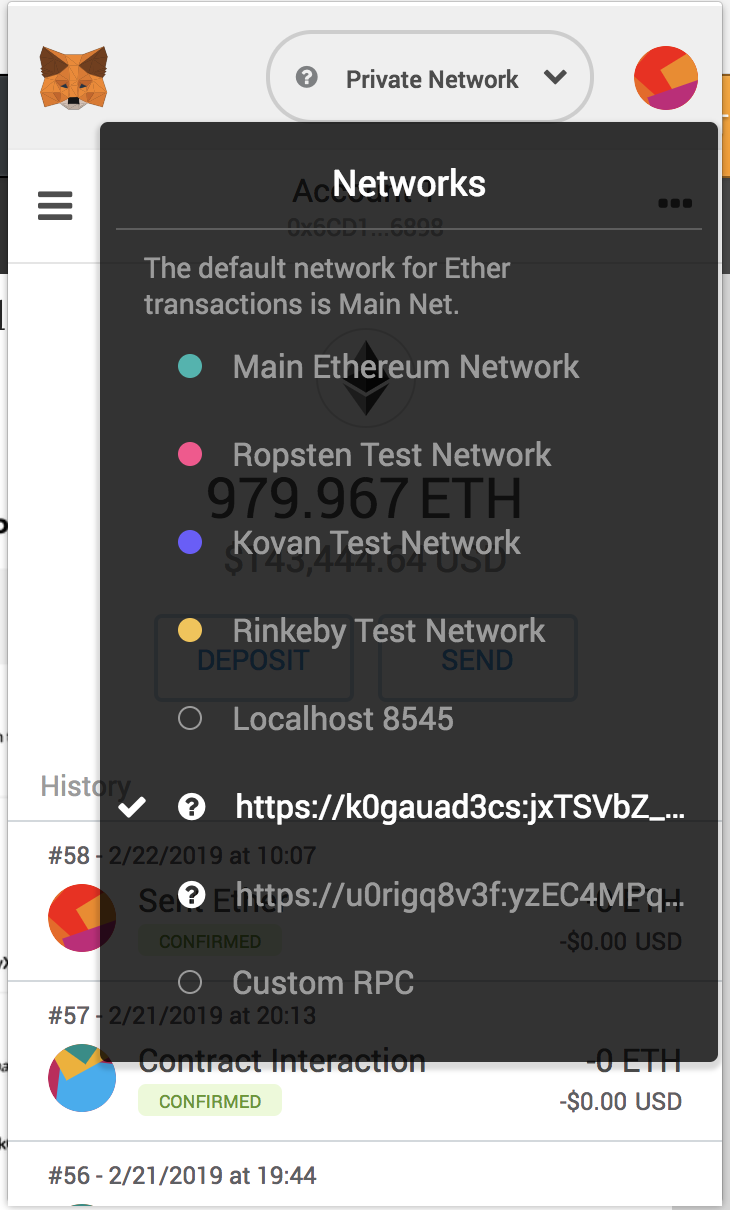 10: Scroll down a little and copy and paste the CONNECTION URL into New Network box (new RPC URL) and save. And done now you are connected to private Ethereum network node which you created on Kaleido. 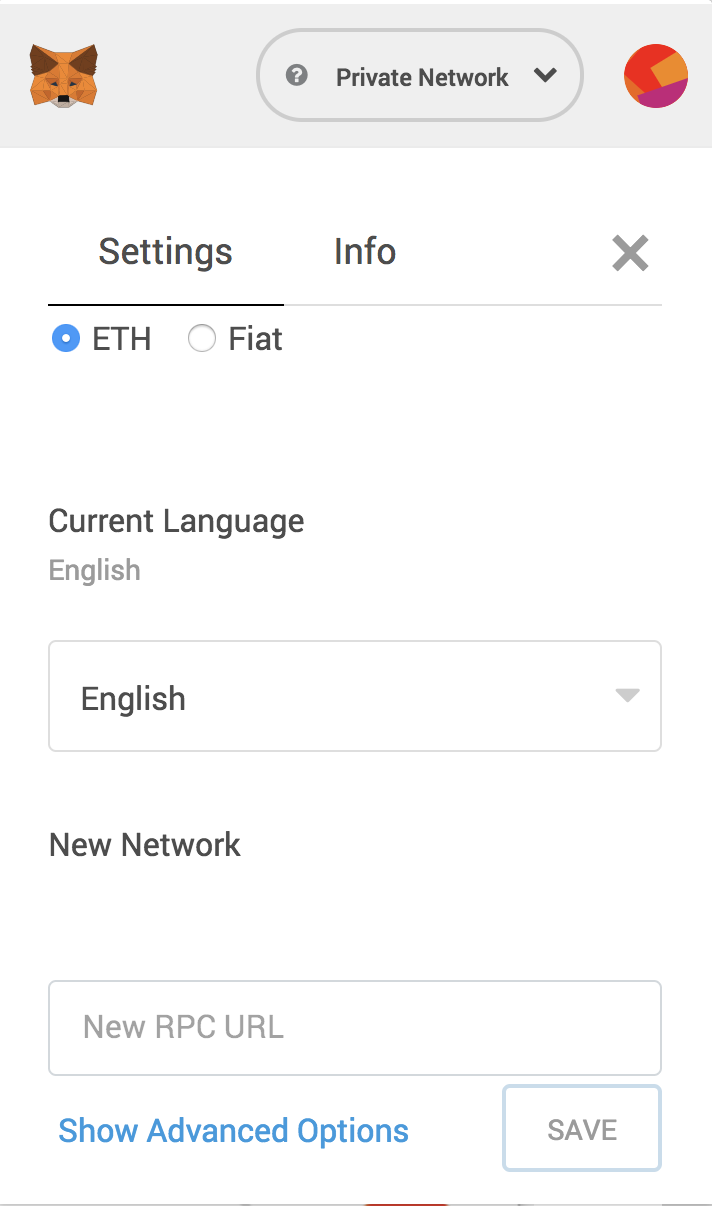 11: Let's add some Ether! Go to main page and click Ether Pool. Copy and paste your Metamask address and send ether as much as you want. (I think this is limited to 1 billion Ether) 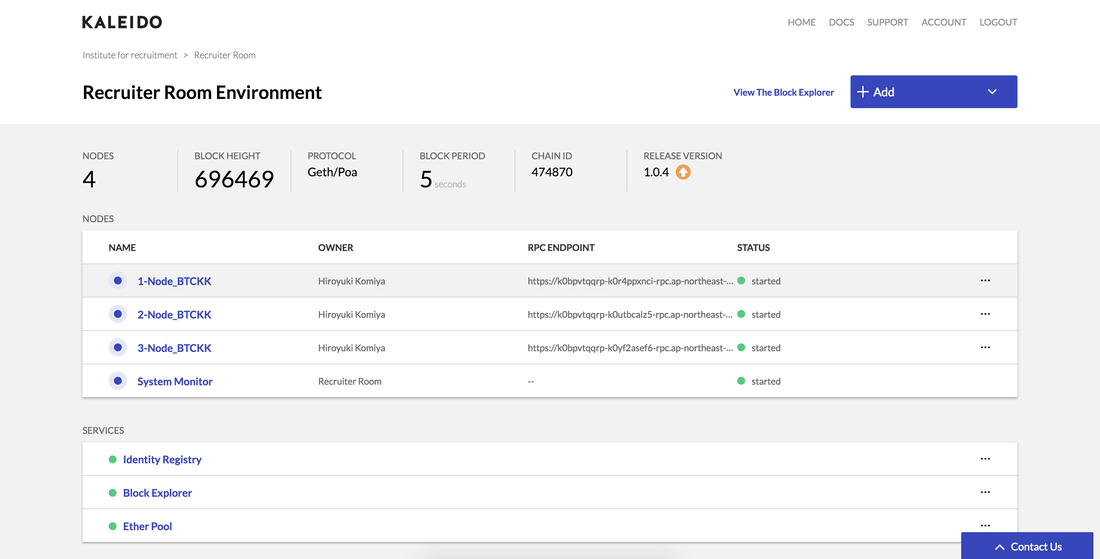 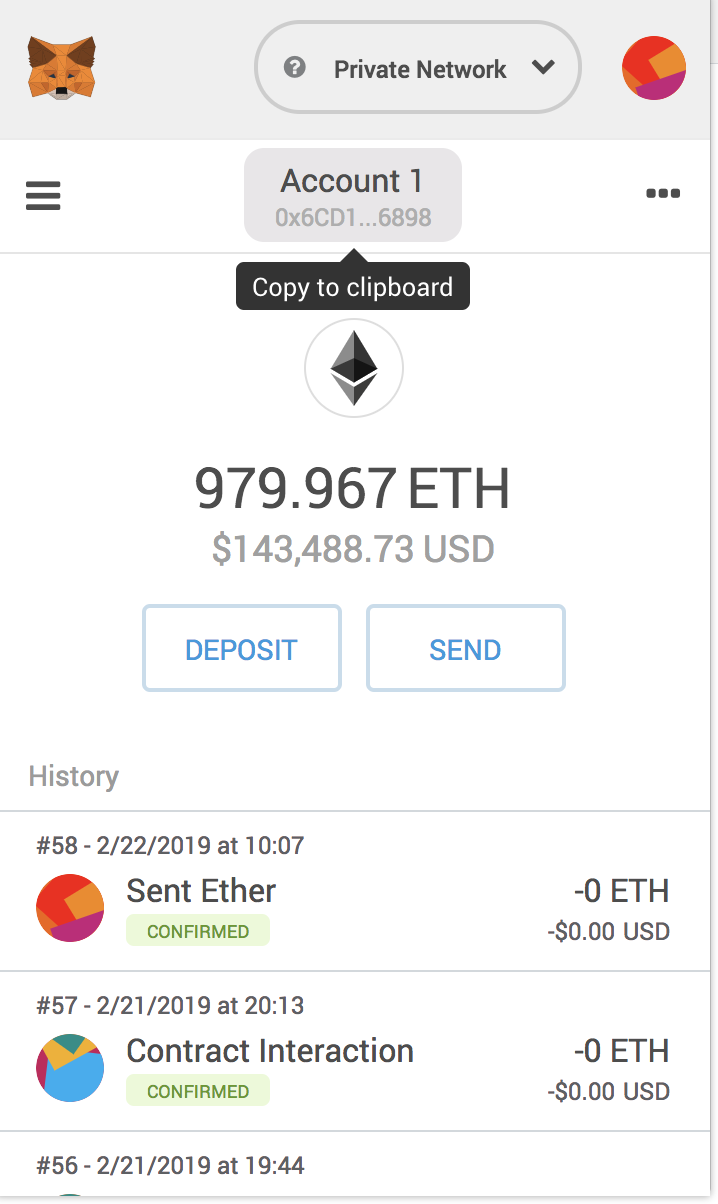 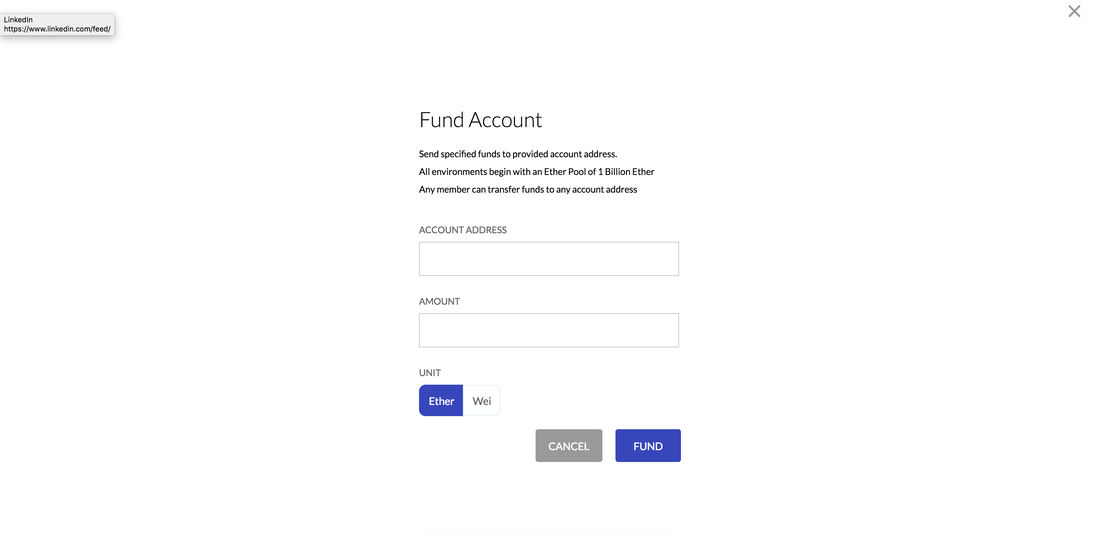 12: You are now connected and ready to use the Ethereum network with the fund. Now go to https://remix.ethereum.org and create smart contract if you are a programmer. If not this is the test I did. https://github.com/Hirokomiya/message/blob/master/message.sol Choose compiler at version:0.4.18+commit.9cf6e910 and deploy 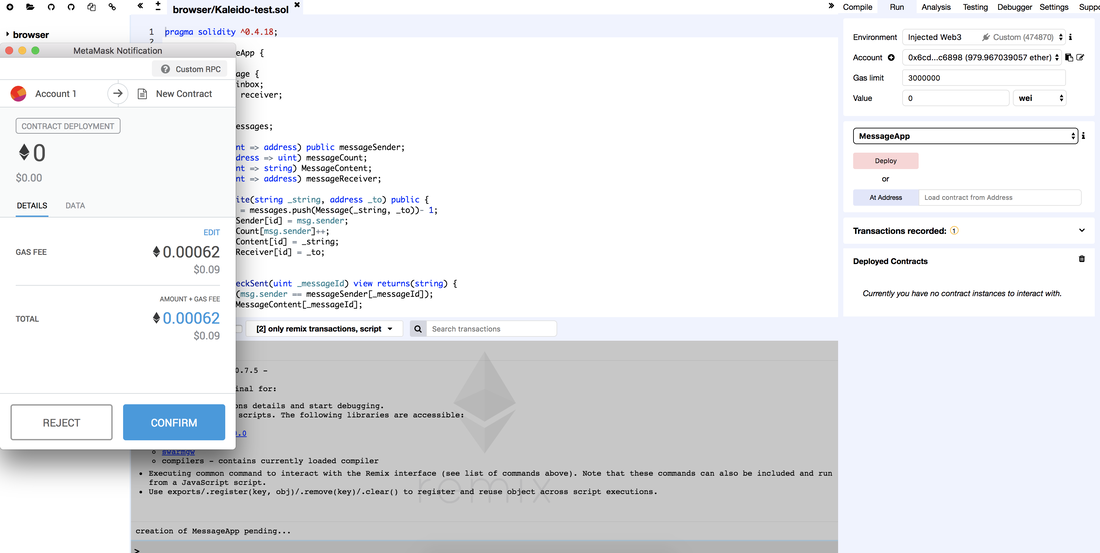 13: copy and paste the smart contract address. in my case it is here 0xa98d32c0c32b1131973f92a8be4ed73e0b2665a3 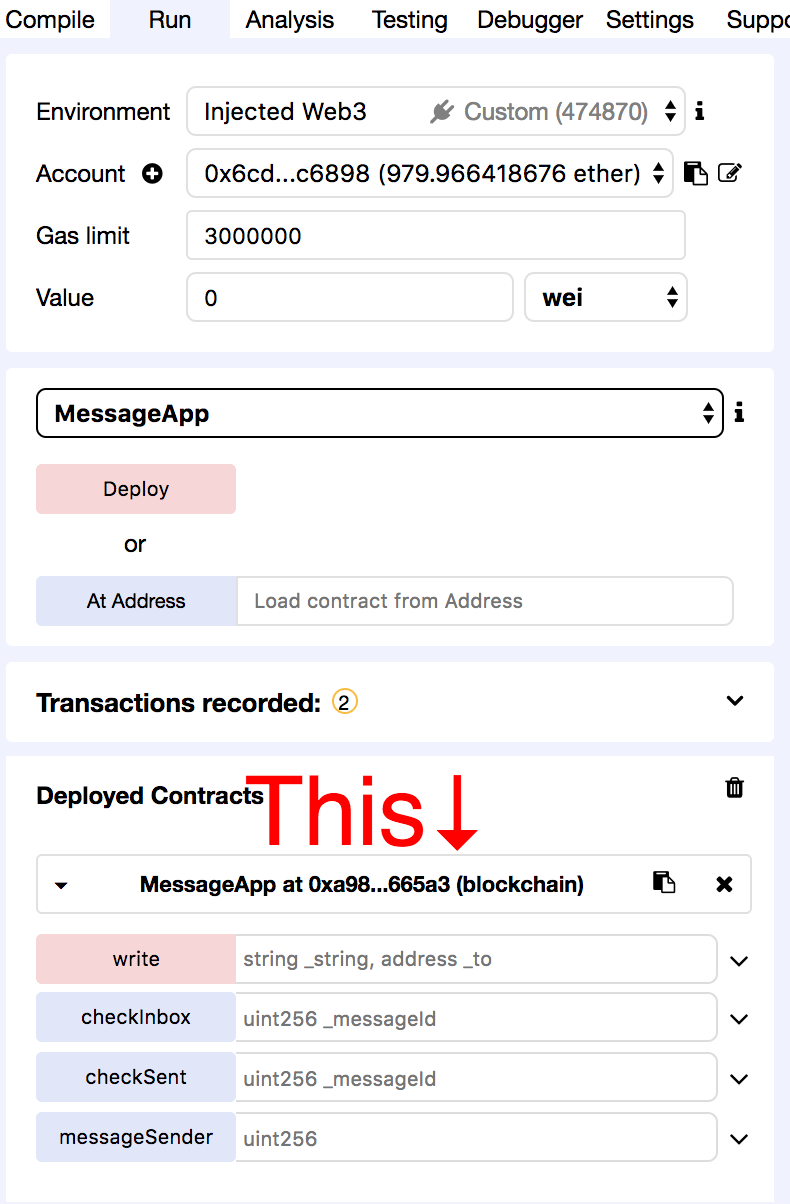 14: Deploy the same contract at the same contract address. Copy and paste the contract address and click "At Address". You are calling the app so that it doesn't cost GAS. (It is good to be free even though it is private network Ether) The window below is signed in to different Metamask account and already connected to Kaleido node. Do the same thing from instruction 5 - 10. 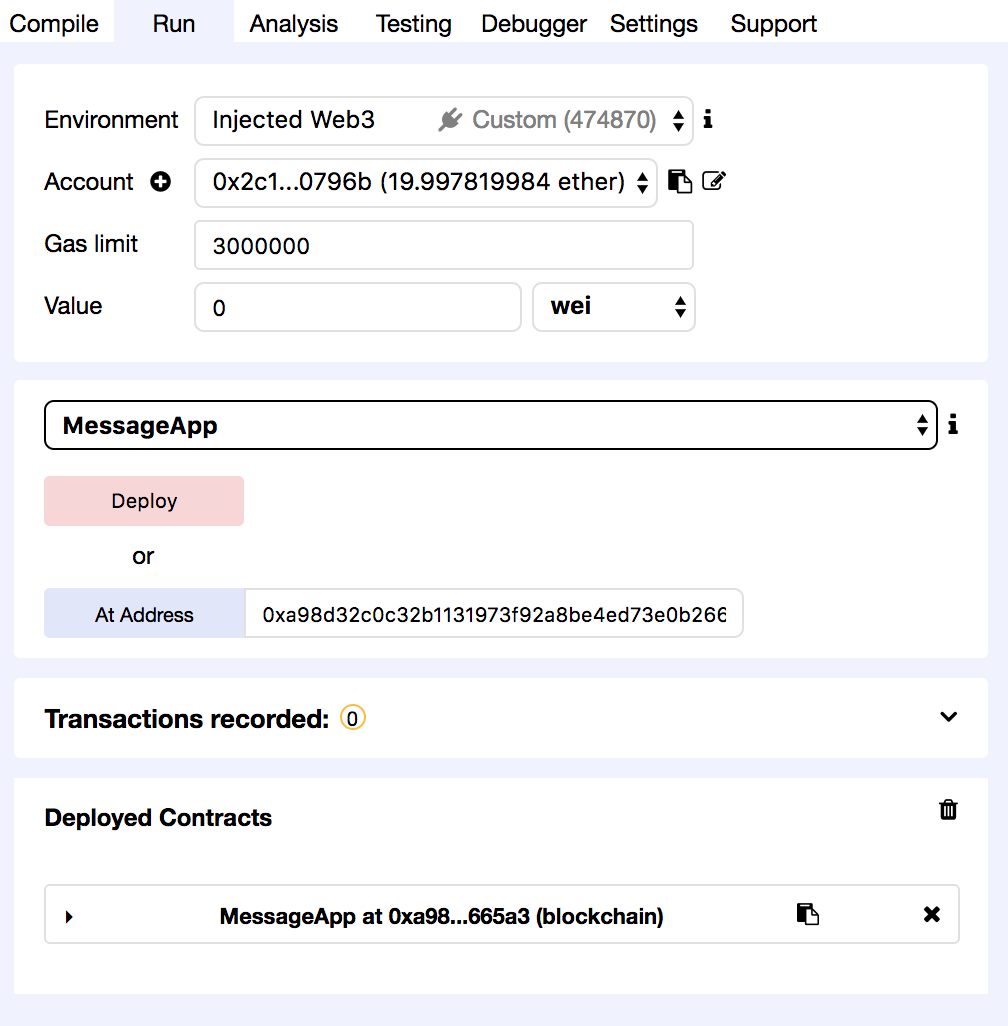 Sample Sending "Hello world!!" from 0x6cd1b82490eb7aa18bec4305c6c2e691194c6898 to 0x2c1cc5eecd5e9d332e8d21d1c03849c27b90796b at the smart contract address 0xa98d32c0c32b1131973f92a8be4ed73e0b2665a3 with this app https://github.com/Hirokomiya/message/blob/master/message.sol 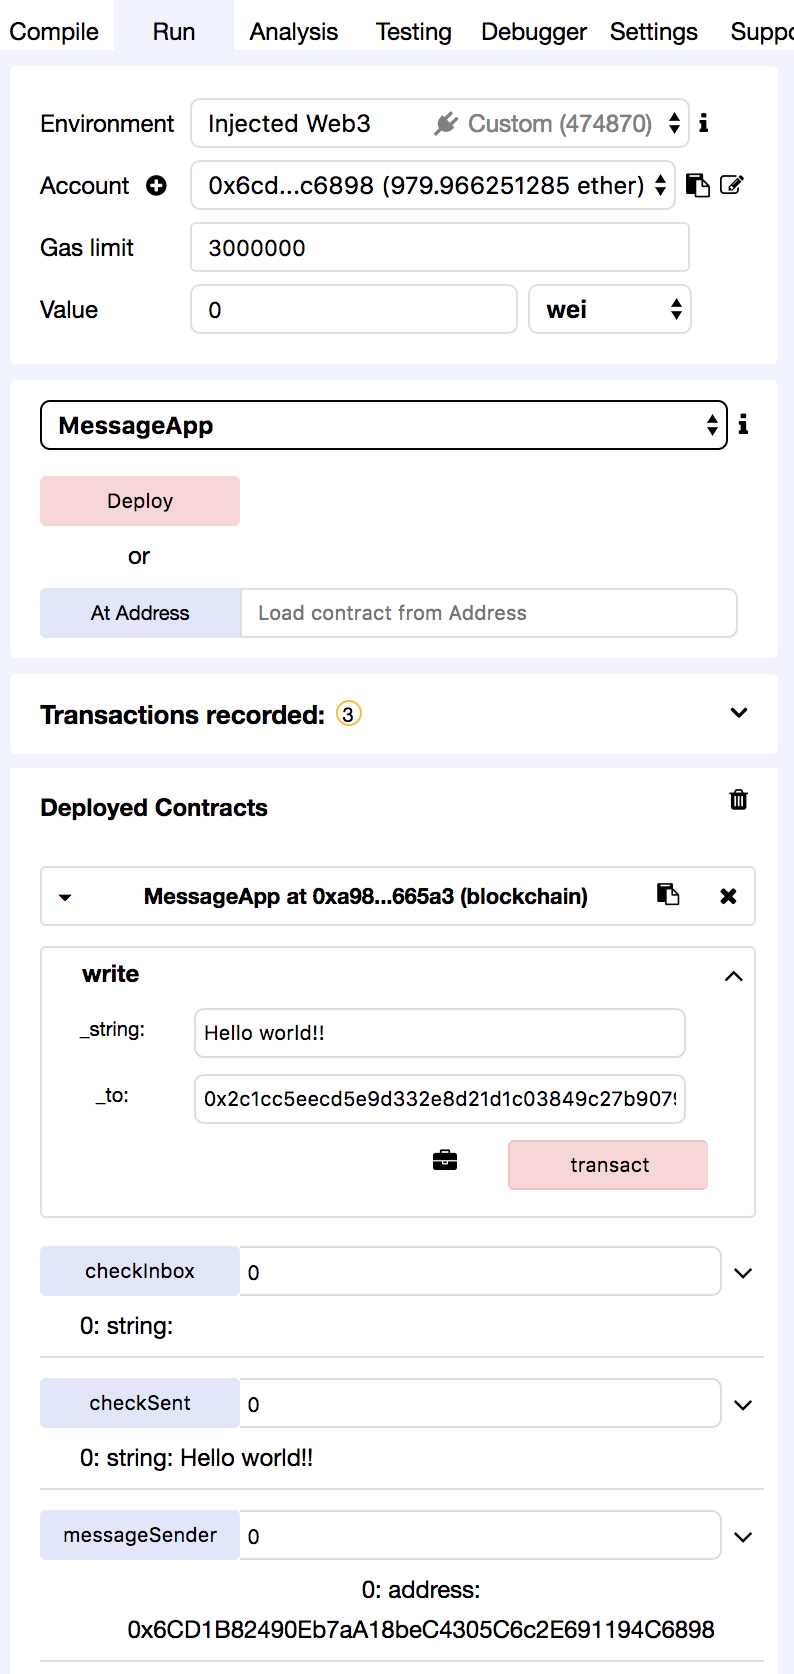 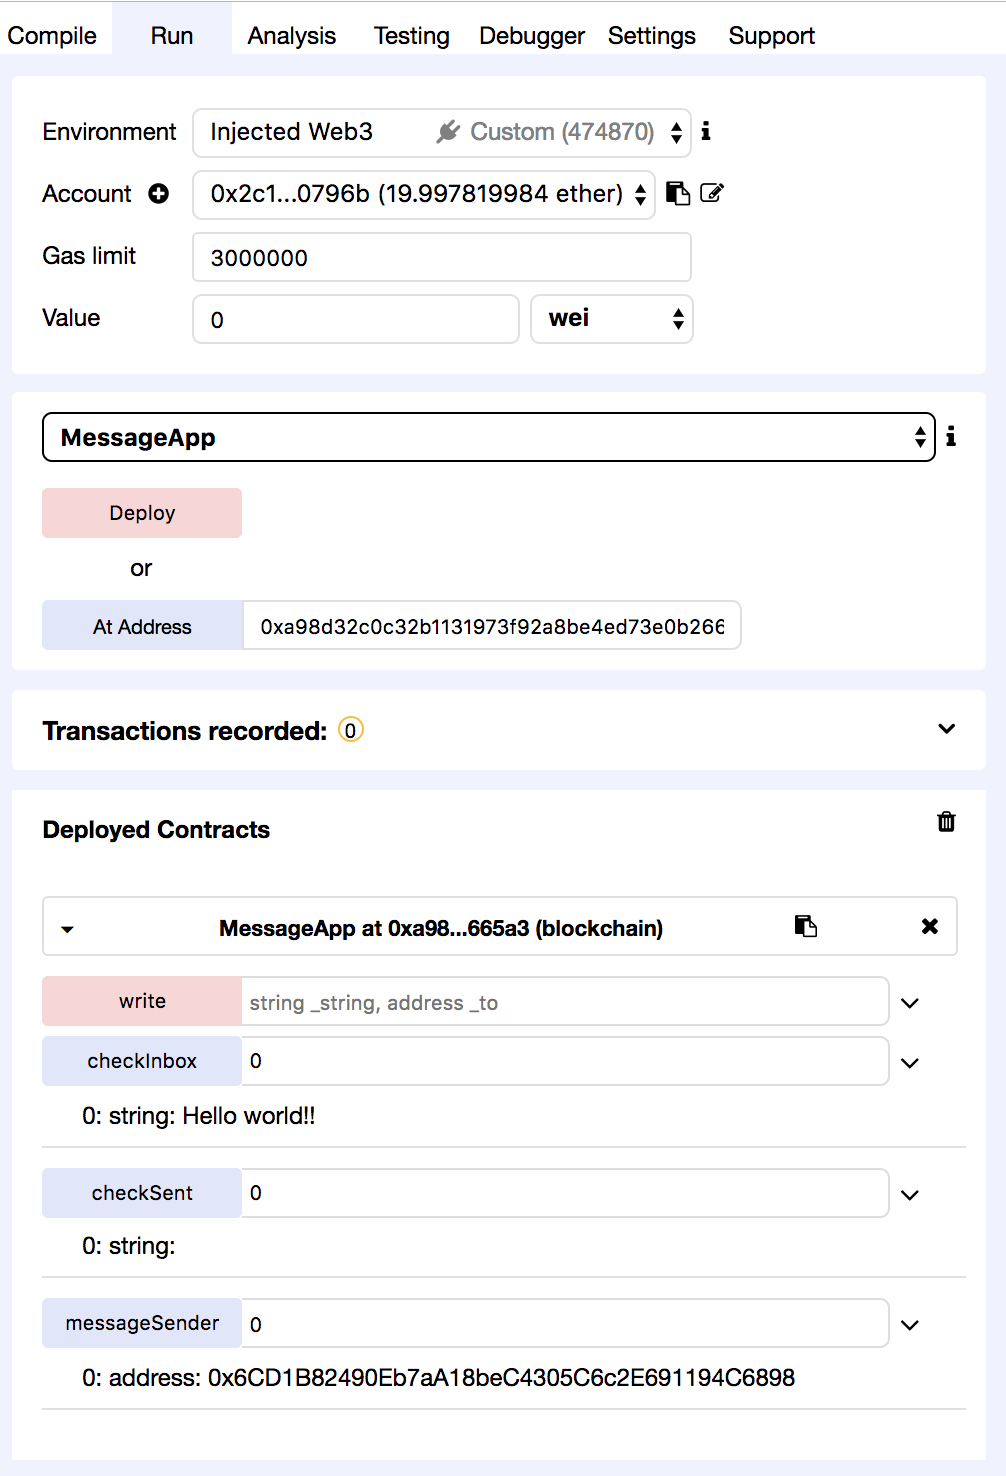 Extra, what I tested
1: If you give your credential URL to others to connect, your connection will automatically be cut and the next one will be able to connect. 2: The smart contract will not work as the same app if you changed the code. Ropsten
|